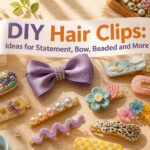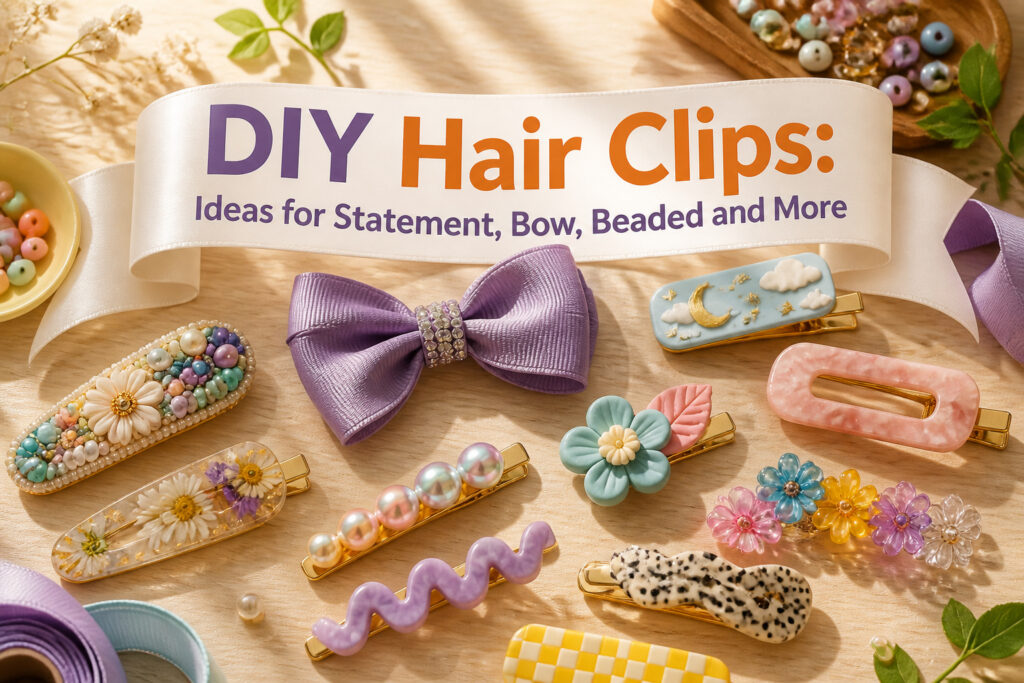
DIY hair clips are handmade accessories you build from ribbon, polymer clay, beads, resin, or salvaged jewelry, then attach to a metal barrette or alligator clip. The catch is that most methods need a full day before you can actually wear them; hot glue feels dry in seconds, but the bond pops under tension until it has cured for 24 hours. A 55-inch length of half-inch ribbon, folded and pinched, gives you a full adult-sized bow that sits right the first time.
1. Statement Hair Clips
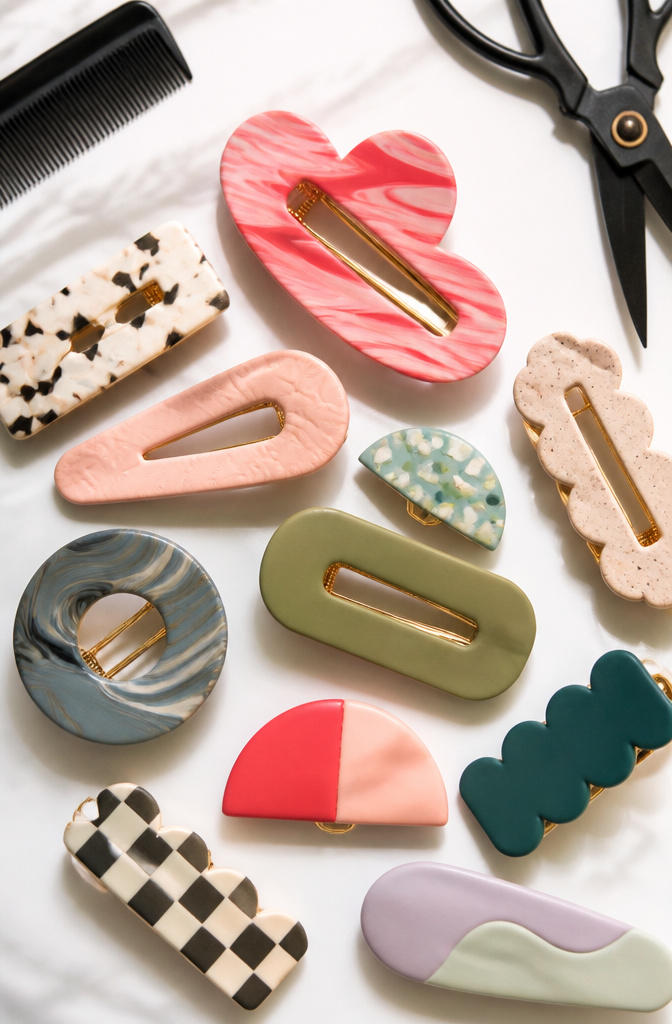
Statement hair clips are where you stop being subtle and start being seen. I like these best when the shape itself does the talking: an oversized heart, a sharp geometric slab, or a color-blocked half-moon that reads more art piece than accessory. Polymer clay is the easiest entry point here. Roll it to about a quarter inch thick, cut your shape, and bake at 275° for 15 minutes, or 30 if you pushed past that thickness. Once it cools, glue it to a barrette backing and you’re done.
The trick is letting the clip carry the outfit. A bold shape or an unusual material, something with real weight to it, works best against a plain white tee or a simple black turtleneck. The clip becomes the focal point without trying to compete with pattern or texture elsewhere. Keep the rest of your look quiet so the statement lands.

Basic Clay Cutters: You will receive 12 pcs clay cutters for these barrettes clay cutters set. They are suitable for making girl hair clips. We made 6 different design, and every design got 2 size, you can refer to the picture for more details.

【Convenient and Easy to Use】Ready to use right out of the package, no mixing required.

Complete Teacher Appreciation Gift Set: this all-in-one teacher gift includes 3 cute hair clips, 3 pairs of teacher beaded dangle earrings and 3 teacher bracelets; Paired with customized thank you cards, it provides a one-stop solution for teacher outfits and gifting needs, saving you time and effort in matching
2. Bow Clips
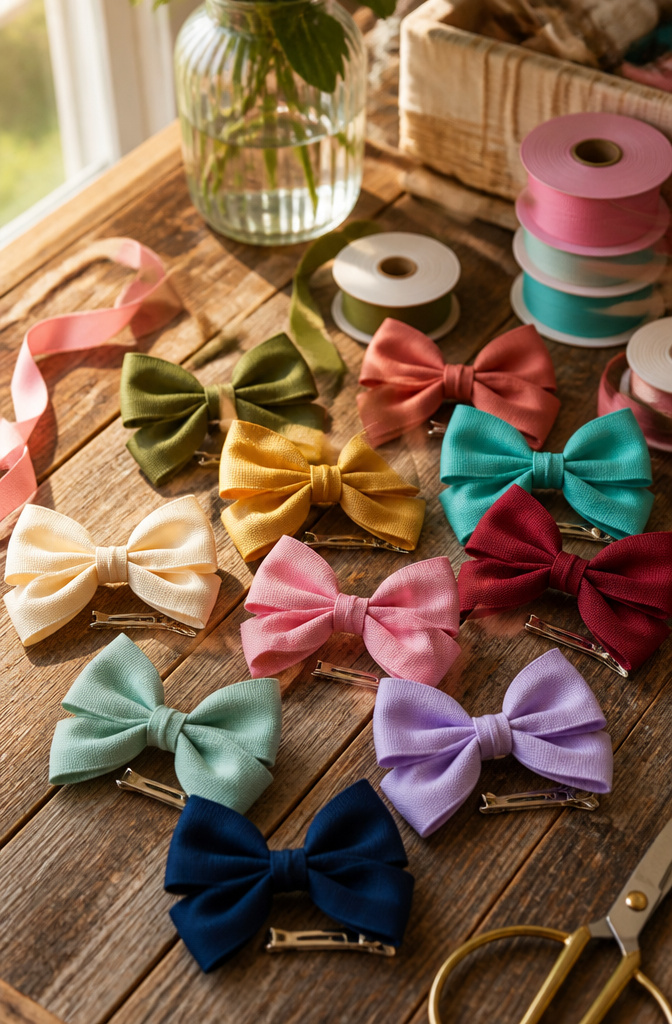
Ribbon bow clips are the easiest place to start with diy hair clips, and the size of your bow depends almost entirely on how much ribbon you cut. 55 to 60 inches of ribbon or fabric, at least 1/2 inch wide, gives you a full, puffy bow that sits nicely in adult hair. Shorter lengths work fine for kids or for a flatter, everyday shape.
I fold both ends toward the middle so they overlap slightly, forming a loop, then pinch the center and hold the folds together. A tight wrap of thread or a small drop of hot glue at that pinch point keeps the shape. For a cleaner look, I wrap a smaller ribbon strip around the center to hide the gathers, gluing the ends at the back. Frayed edges are a quick fix: pass a lighter along the cut ribbon ends to seal them.
Attaching the bow is straightforward. A line of hot glue across the top of a metal alligator clip or barrette does the job, though I let the glue set fully before wearing it. For a layered look, stack two ribbons before folding and pinching them together; the contrast shows without extra work.

Quantity and Size: 70 pcs alligator hair clips, 3 sizes, 3.9 inch*10, 2.2 inch*20, 1.77 inch*40, can be used for a long time, enough for daily use at home, or share with friends, also can be used as hair fixer for salon tool, very useful.

Material & Size: Made of nice metal with smooth surface, the alligator hair clips are strong and sturdy, long lasting, each metal clip is 1.77 in in length, proper size with good quality, very practical hair accessories

🍎 Strict Quality Control ! Sturdy enough for casual/personal use!
3. Beaded Clips
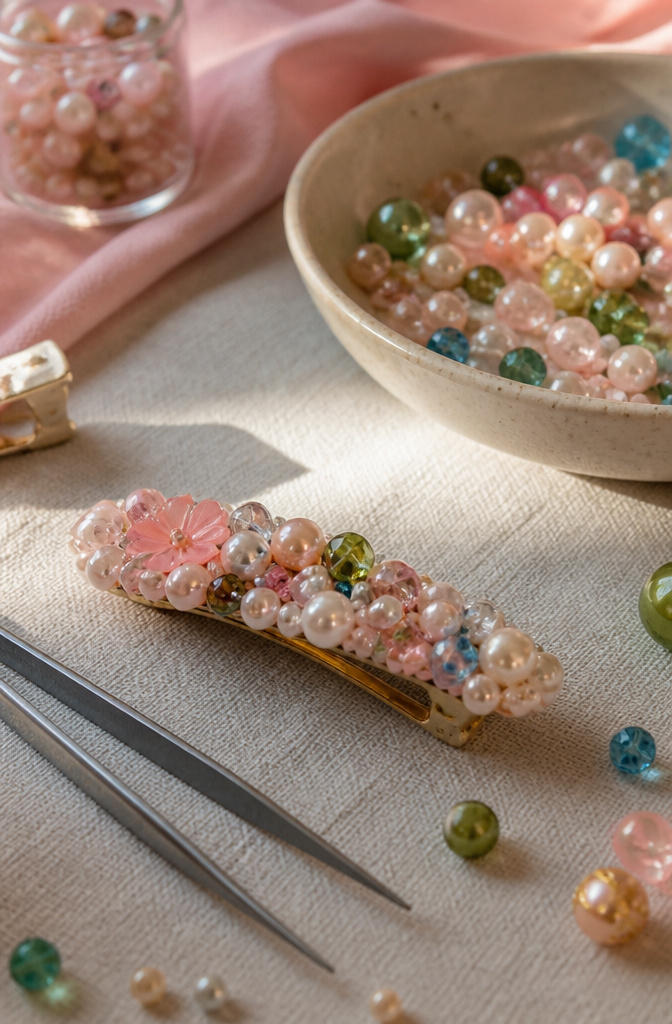
Beaded clips look delicate, but the method is straightforward once you settle on your approach. Flat clip bases give you the easiest surface to work with. Spread a thin, even layer of glue across that flat area, then set beads one at a time using tweezers or a toothpick to nudge them into place. Work from one end and build your pattern as you go. Small gaps happen; fill them later with smaller beads so the surface looks full.
Hot glue sets in 10–15 seconds, which feels fast until you bump a bead crooked and realize there is no window to fix it. For gems or heavier embellishments, Beacon Power-Tac Glue is the better hold. Either way, that dry-to-the-touch moment is misleading. The clip needs 24 hours before wearing or the beads will pop off in your hair. I have learned to plan around that wait rather than test it.

Blank Design: These metal French barrettes offer a clean and flat surface for your creative design. You can easily attach beautiful beads, pearls, or fabric bows on them. They help you turn simple bases into personalized accessories

【Package Content】You receive 100 pieces of rainbow-colored mini claw clips, adequate quantity, abundant colors, ensuring you have plenty for daily use and matching with various outfits.

Material: Alloy; Circle-Size:6 cm; Color:Gold, Silver
4. Polymer Clay Clips
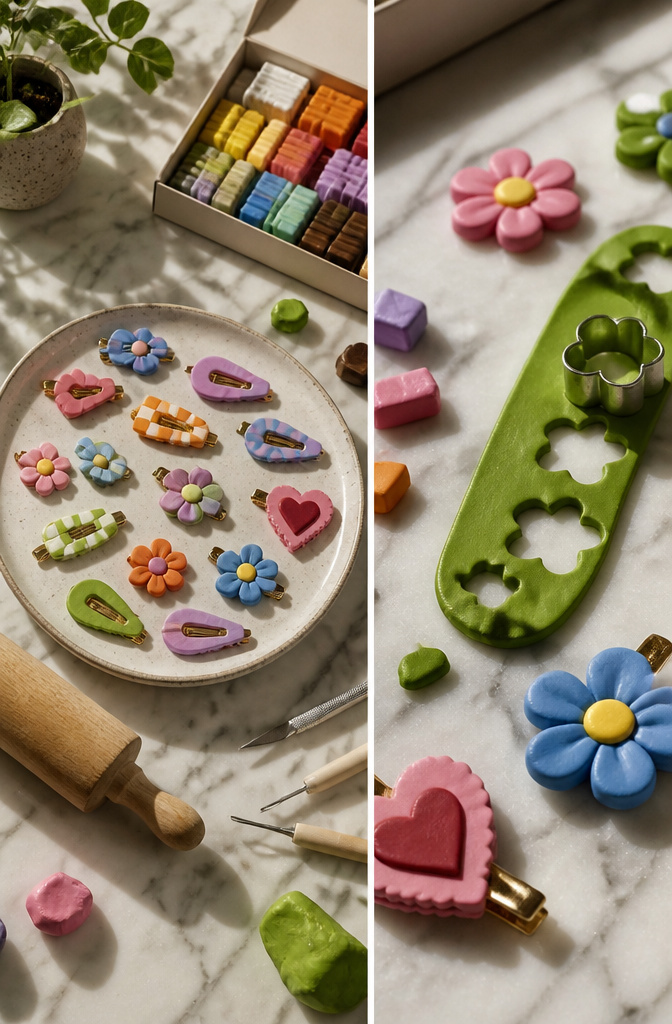
Polymer clay gives you solid, permanent shapes that hold up to daily wear better than air-dry alternatives. I start by kneading the clay until it softens, then roll it to about a quarter inch thick. Small cutters make quick work of hearts, flowers, or circles, and a toothpick adds texture where I want it.
Bake at 275°F for 15 minutes, or 30 minutes if the piece is over a quarter inch thick. Let it cool completely before handling, since the clay firms up only as the temperature drops. Any rough edges get trimmed with scissors or an X-Acto knife once it is cool enough to touch.
Sculpey liquid clay works well for this project, and it has other uses beyond hair clips. I have seen it used for Croc charms, jewelry, home décor, and scrapbooking. A strong glue attaches the baked piece to the clip base, and I let it dry fully before wearing.
A polymer clay kit usually includes multiple colors, sculpting tools, and sometimes the clip hardware itself. That saves a separate trip for supplies and gives you more options for mixing custom shades.

Package content: the silicone resin mold set includes 6 pieces of hairpin resin molds and 30 pieces of metal hairpins, totally 36 pieces, which can easily design and create your own exquisite silicone hair clips, suitable for almost all clothing, hair colors and hairstyles
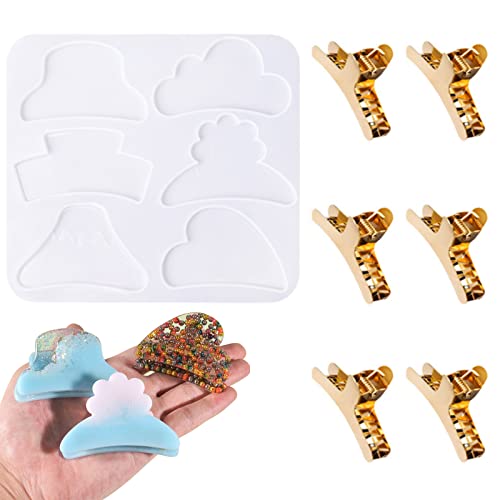
【QUALITY MATERIAL】: The hairpin resin mould is made of high-quality silicone, soft, flexible, resistant to tearing, which can be used for a long time. The hair barrettes are made of alloy, the surface comes with electroplating process, smooth, not easy to be faded, bright and elegant.

Package includes: 7 PCS hair clip molds in different shapes (such as water droplets, rectangles, strip, triangle, ellipse), 24 PCS hair clips. Enough quantity and various styles for you to DIY different hair clips.
5. Shrinky Dink Clips
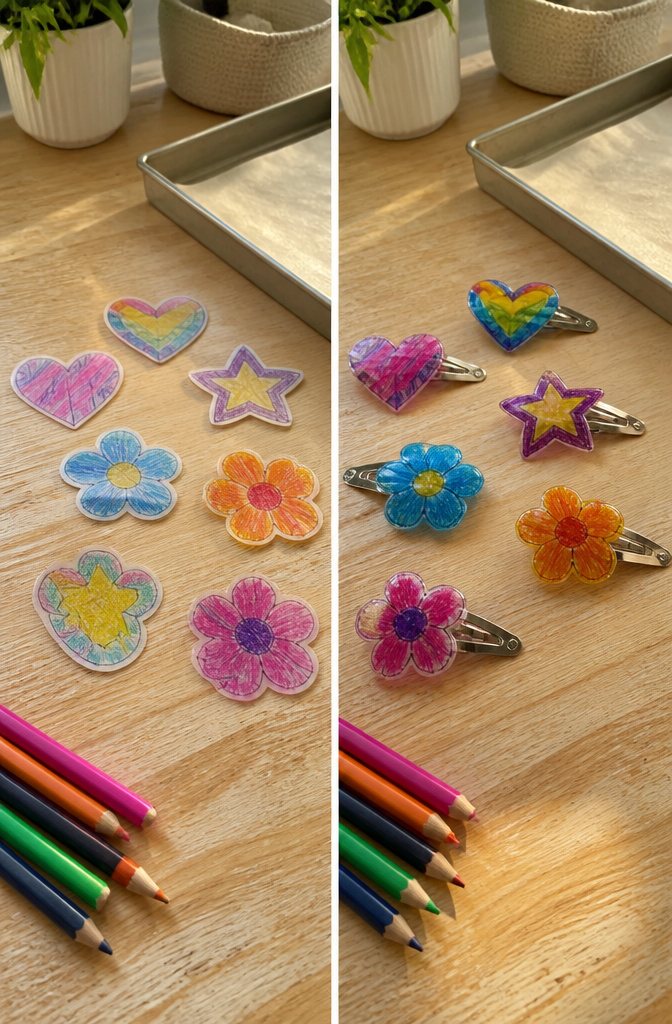
Shrink plastic sheets are one of those materials that feels like a magic trick the first time you use them. You draw something roughly the size of your palm, pop it in the oven, and watch it curl and flatten into a tiny, rock-hard version of itself. For hair clips, that shrinking process is exactly what makes the technique work: you get lightweight custom shapes with crisp edges, and they hold up better than you’d expect against daily wear.
The process itself is straightforward. You draw your design on the rough side of the sheet with colored pencils or permanent markers, then cut it out leaving a small border. Simple shapes work best here: fruits, hearts, flowers, little stars. Anything too intricate gets messy when the plastic shrinks. You lay the cutout on parchment paper over a baking sheet, bake at whatever temperature the package specifies (brands vary, so check), and watch it curl up before flattening back down. Once it’s flat, pull it out and let it cool. If it needs a little extra flattening, a book pressed on top while it’s still warm does the job.
The finished piece gets glued to a standard clip base with a strong adhesive. Bake several at once if you’re making a set, but leave space between them so they don’t stick together. The whole thing takes maybe twenty minutes start to finish, and the results are genuinely durable. It’s not the most common approach you’ll see in DIY hair clip tutorials, which is a shame, because the weight is almost nothing and the shapes keep their color for months.
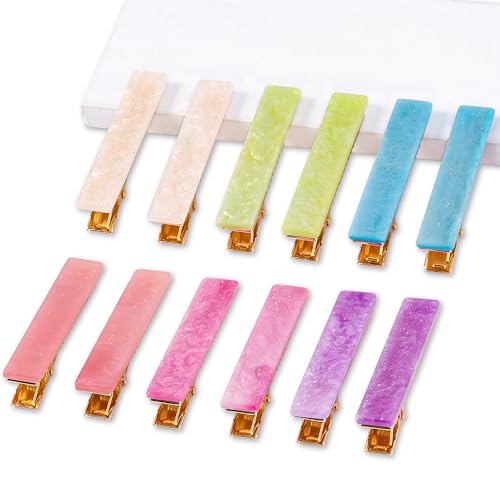
PACKAGE:The cute hair clips set contains 12 pcs different color hair clips for women, ideally match your clothing and hairstyle to make you look elegant and glamorous

The bow clips top is smooth. Clips are perfect for hair bows making and great to hold a vintage wave look, hold back parted hair for braiding and holding in curlers and retro hairstyles

6. Word Clips
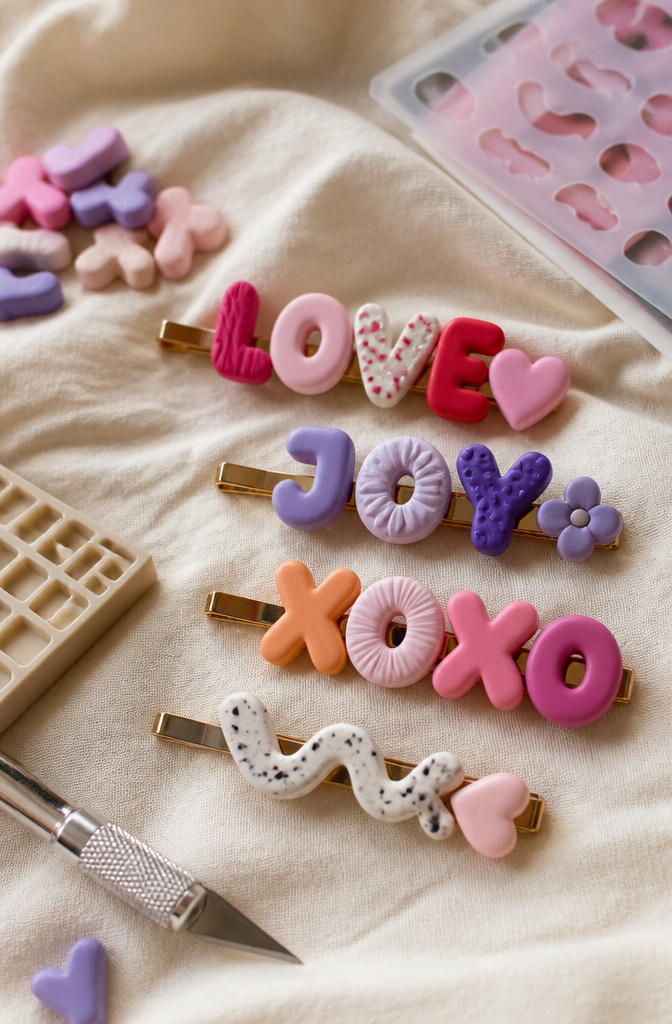
Letter beads are the easiest entry point for word clips, but the font matters more than most people expect. A cursive strand can look elegant on the spool and turn into an unreadable tangle once it is cut and glued to a clip base. I stick to sans-serif block letters for anything under an inch long, and I leave a full bead space between words so the eye catches the break.
Polymer clay lettering gives you cleaner edges and any font you can carve. Roll it to about a quarter inch thick, score your word with a toothpick or small blade, then bake per the package directions. The catch is shrinkage: even "oven-safe" clay pulls inward slightly, so wide letters like M or W can crack at the joints if they are too thin.
Shrink plastic works for flat words with crisp outlines. Draw your phrase at roughly three times the finished size, bake until it curls and flattens, then glue the cooled piece down. The plastic thickens as it shrinks, which helps legibility, but pale colors turn muddy at small scale. I would not go lighter than a medium pencil line if you want the word readable from more than arm’s length.
Wire shaping skips beads and clay entirely, though it takes patience. A fine-gauge wire looped into block letters can sit directly on the clip, but the loops loosen with wear. Glue a second wire backing across the vertical strokes if you want the shape to hold.

Package Included: 100pcs 10mm polymer clay beads with a roll of elastic string.

Product Included: You will get 250 pieces of volleyball polymer clay slices. These sufficient number of ball polymer clay slices can meet your daily use and replacement needs.

🏐【300PCS Value Bulk & Volleyball Beads Supplies】This package includes 300 pieces of vivid printed volleyball beads, abundant quantity to meet large-scale DIY production, craft sharing and daily handmade needs. Rich stock is perfect for sports themed creation, easy to match with other volleyball accessories, and brings high cost performance for your handmade projects.
7. Feather Clips
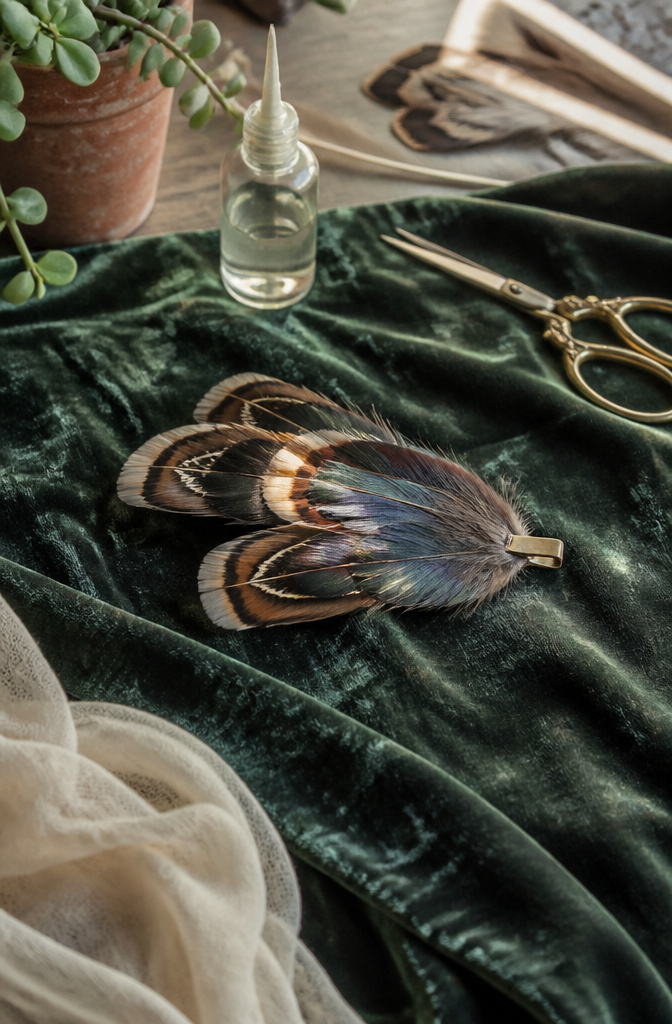
Feather clips bring real movement to a hair accessory, but the trick is keeping them from shedding after a few wears. I start with turkey or hackle feathers, which hold up better than the delicate plumes sold for floral arrangements. Trim the quill close to the vane so the feather lies flat against the clip base, and always remove the wispy bottom barbs that catch on everything.
Layering takes three to five feathers per clip, fanning them slightly so the ends overlap like shingles. Beacon Power-Tac Glue is what I’d reach for here. It dries clear in 24 hours and grips both natural materials and metal or plastic findings, so the bond outlasts the trend cycle. Apply a thin line along the quill, press it onto a fabric-wrapped snap clip or alligator clip, and let it cure untouched. The wait matters; wearing it too soon lets the quill torque loose against your hair. Once set, a small felt oval glued over the quills hides the mechanics and gives the whole piece a finished back.

Hair Accessories Are Clear At A Glance: Size:40 *1.57 inches. Large capacity to saves space. The bow holder has 3 ropes, which can hold at least 20 to 50 adult bows. Meet the your daily hair accessories organizer needs.Add a charming touch to your room while putting an end to the endless hunt for missing hair clips

Hair bows for toddler girls with clips, made of vibrant grosgrain ribbon,perfect gift for little girls, toddler hair accessories for girls,strong non-slip alligator clips hold fine hair, toddler bows for girls hair perfect for kids birthday gift, Christmas stocking stuffers for girls.
8. Glitter Clips
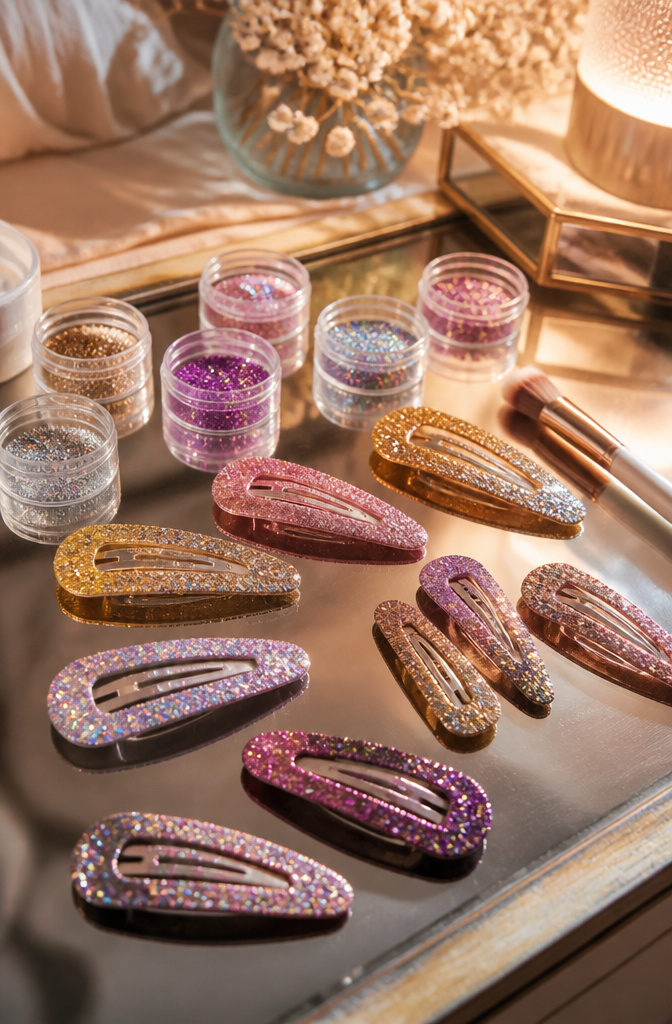
Glitter looks fun until you find it on your collar three days later, so the sealing method matters more than the sparkle itself. Mod Podge brushed over loose glitter and left to cure fully gives a flexible, washable skin that keeps the flakes where they belong. I would not skip the second coat; one layer cracks at the edges where the clip flexes.
Resin embedding is the smoother route if you already mix the stuff for other projects. The glitter suspends in the liquid, you pour a thin dome over the clip base, and the finished face is glassy and flat against the hair. No texture means no snagging, which matters more than you’d think when you’re pulling a clip out at the end of the day.
Glitter-specific adhesives exist and they work fast, but they dry with a slight tack that picks up dust and loose strands. If you go that route, a clear nail polish topcoat over the cured adhesive solves the texture problem without adding much bulk.
The real failure point is the rim where the decorative top meets the metal. Seal right to that edge, or the glitter line will look ragged and start lifting within a few wears.
9. Tortoise Shell Clips
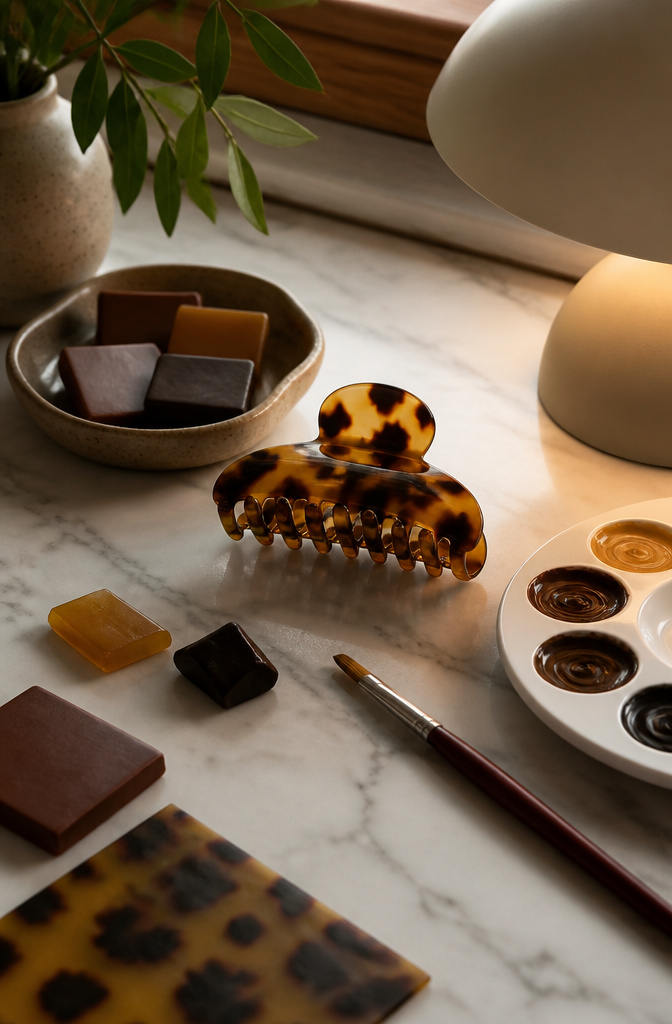
The tortoise shell look comes down to three colors: amber, brown, and black swirled together so they read as mottled rather than striped. Liquid polymer clay handles this well. Squeeze your darkest shade into the corners and gaps of a clip mold, then fill the remaining space with amber. Drag a toothpick through the two colors while pressing against the mold bottom, since that surface becomes the visible top after baking. Bake at 275° for 15 minutes, or stretch to 30 if your mold runs thicker than a quarter inch.
Acetate sheets offer a faster route. Paint the mottled pattern directly onto the sheet with acrylics, let it dry, then cut and glue to a metal base. The sheet stays lightweight, which matters if you are working with a long barrette that would otherwise pull.
For a more dimensional finish, solid polymer clay works too. Roll thin layers of brown and amber, tear them into irregular pieces, and press them together before cutting your shape. The torn edges blend better than clean cuts, so the color transition looks organic rather like stacked blocks. The trick is keeping black sparse; too much and you lose the warm glow that makes the pattern recognizable.
10. Vintage Jewelry Clips
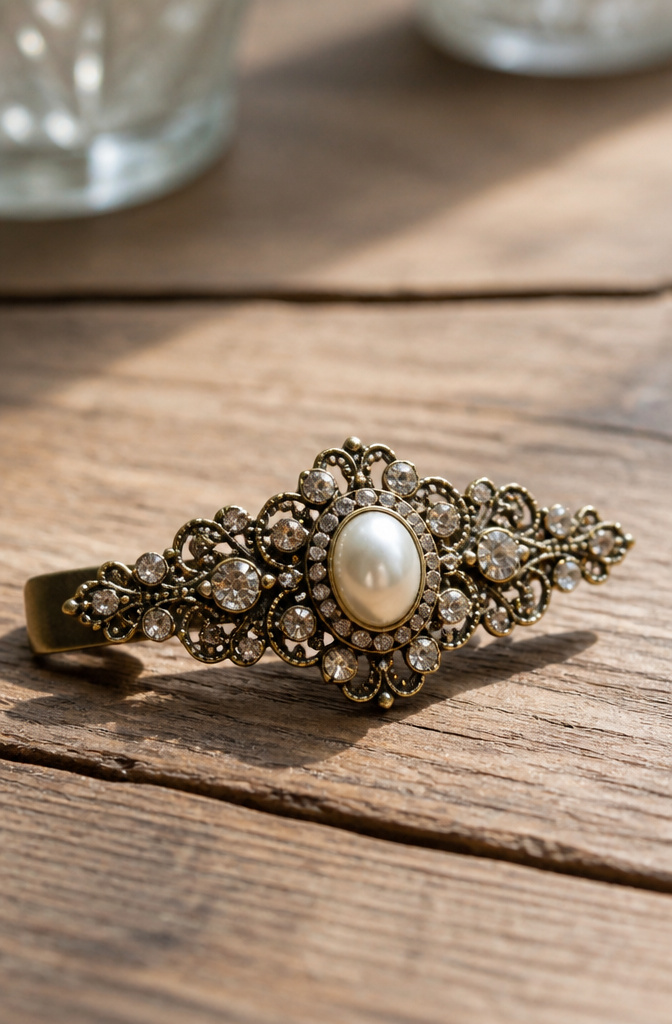
Vintage brooches and clip-on earrings that sit unworn in jewelry boxes make some of the most striking hair accessories you will find. The metalwork and stone settings are already finished by craftspeople from another era, so the job is mostly mechanical: remove the existing pin stem or earring clip with pliers, file any rough spots flush, and attach a new alligator clip or barrette base with strong two-part epoxy. Keep the original patina if you can. A polished brass brooch from the 1960s loses its character the second you hit it with metal polish, and the slightly softened color is usually what makes the piece look expensive rather than costume. Work over newspaper, wear gloves, and clamp the new hardware while the glue cures overnight. You will end up with something no one else can duplicate, which is the whole point of making clips yourself instead of buying them mass-produced.
11. Mosaic Clips
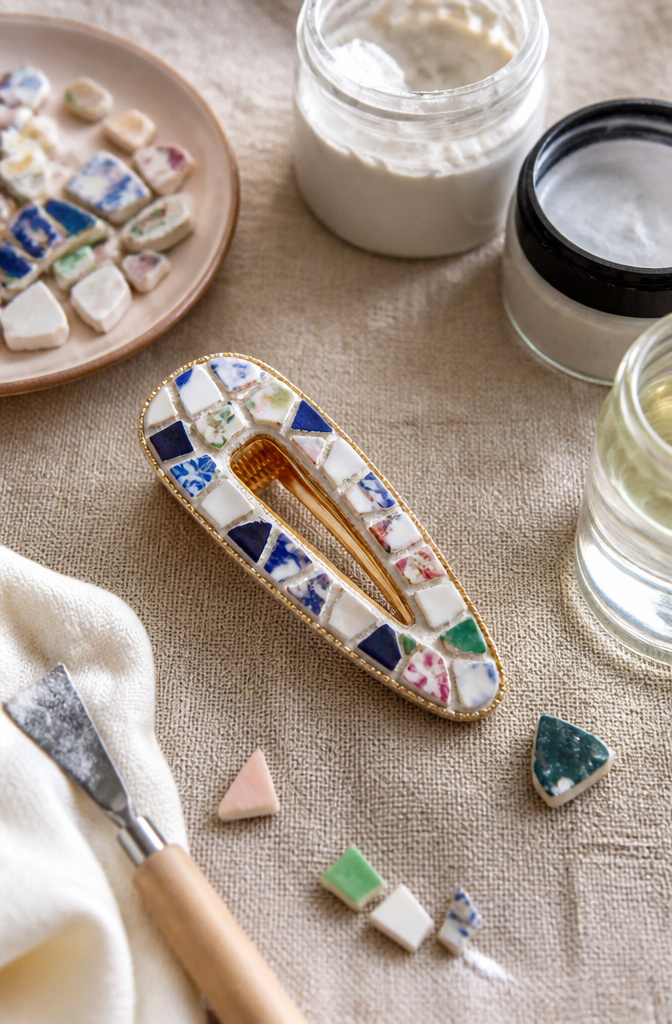
Small tiles or broken china turn a plain clip into something that catches light from every angle. I like polymer clay for this too: roll it to about a quarter inch thick, cut tiny shapes, and bake them according to the package instructions. Once cooled, arrange your pieces on the clip surface with a strong glue, leaving narrow gaps between them for grout.
Grouting is the step that makes it look finished rather than glued-together. Press grout into the gaps, wipe the excess with a damp cloth before it sets, and let it cure fully. After that, seal the whole surface with a clear coat. The edges are what matter most here: run your finger along every side and corner after sealing. Anything that snags your fingertip will catch hair, so sand or file until the surface is completely smooth. Let the sealant dry completely, at least a full day, before you wear them.
12. Resin Clips
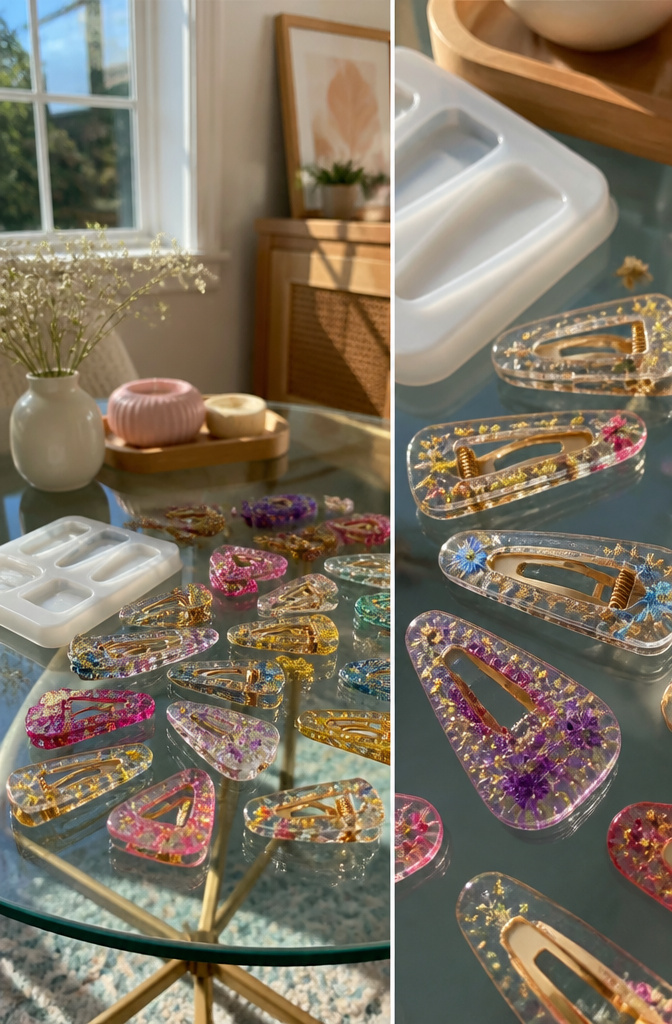
Resin clips look like glass but weigh almost nothing, which makes them comfortable to wear all day. The process starts with a two-part epoxy that you mix according to the manufacturer’s ratio, usually one to one by volume. Work in a space with open windows or a fan pulling air out, because the fumes will give you a headache fast and they are not something you want to breathe for hours.
Small silicone molds or open metal bezels glued to clip blanks both work well. Pour a thin base layer, let it sit until tacky, then set in dried flowers, glitter, or tiny paper cutouts before covering with more resin. Bubbles rise to the surface and you can pop them with a toothpick or a quick pass from a small torch or heat gun held several inches away.
Cure time is the part that tests your patience. Most resins feel hard in a day but need a full two to three days before they stop bending under pressure. I have rushed this and ended up with thumbprints permanently embedded in the surface. If you are embedding anything organic, seal it first with a quick brush of clear glue so the resin does not discolor it while curing.
Materials That Hold Up
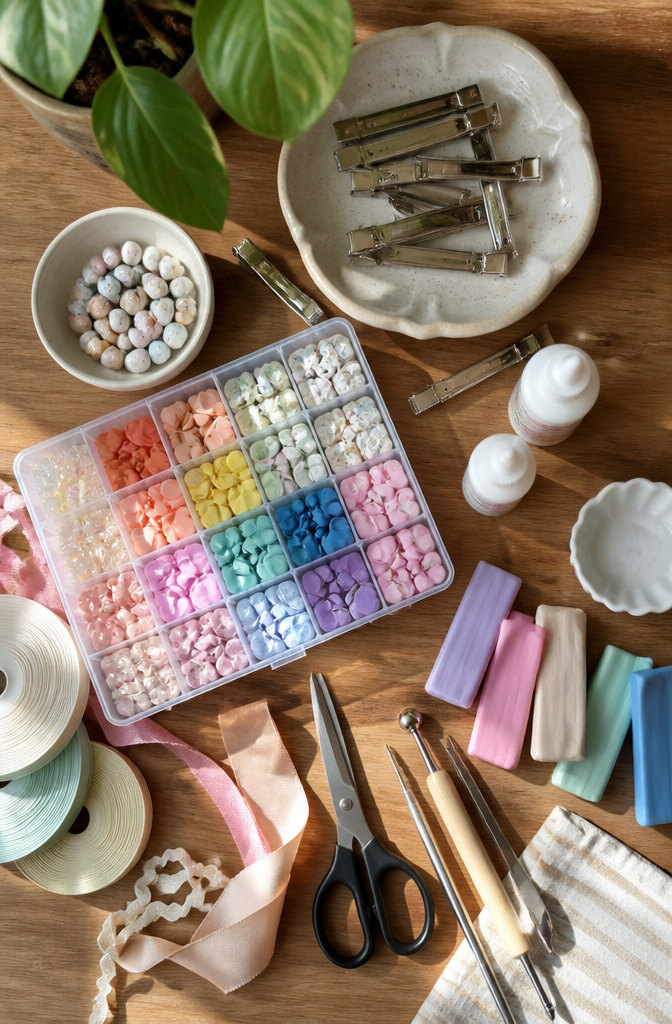
The materials you choose for diy hair clips decide whether they survive a humid afternoon or fall apart by lunch. Here’s what holds up and why.
- Polymer clay bakes hard and keeps its shape, so it works well for sculpted shapes like flowers or hearts. Air-dry clay is an option, but it needs to stay dry afterward; one splash and it softens again.
- Beads and gems add weight fast. A barrette loaded with shells or large stones needs 24 hours of drying time before you wear it, or the glue gives way mid-day.
- Ribbon in grosgrain or satin makes bows that stay crisp. Seal the cut edges with a quick pass of a lighter, or they fray within a week.
- Feathers and light trims move beautifully but tangle in wind and rain. They’re weekend pieces, not everyday wear.
- Resin gives you a glassy, sealed surface that protects embedded items like dried flowers or glitter. It takes longer to cure, but the finish outlasts glued-on alternatives.
- Hot glue is the usual adhesive for ribbon and light embellishments. For anything heavier, a jewelry-grade glue holds better through brushing and heat.
Pick materials for the life you actually lead, not the craft table.
Gluing, Baking, and Sewing
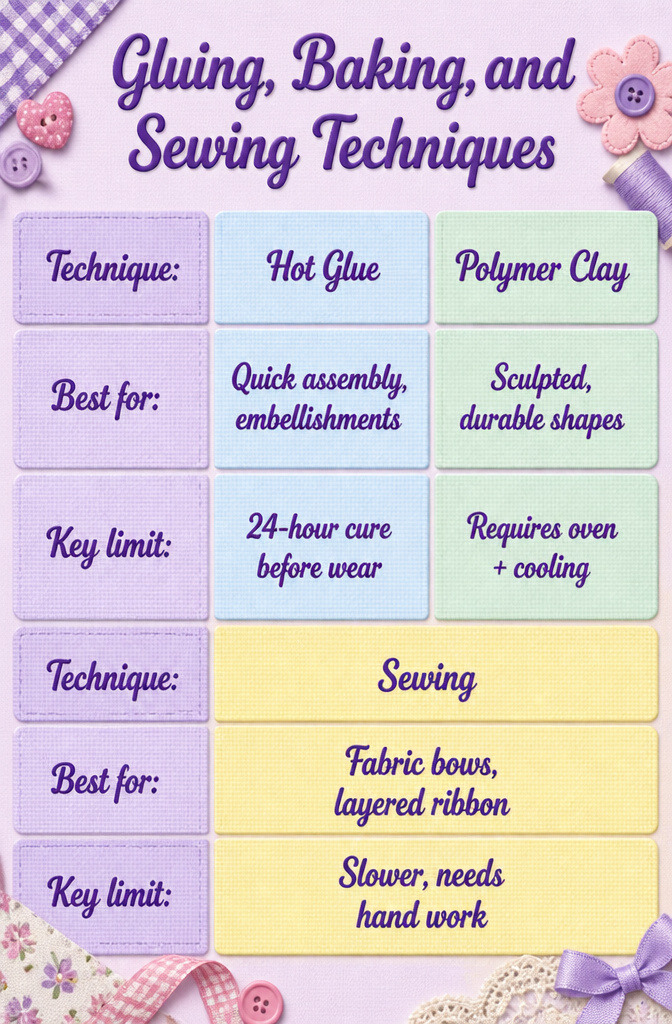
Three techniques cover almost every diy hair clip build, and each has a clear best use.
Hot glue is the fastest option: it sets in 10–15 seconds, so you can position shells or gems without them sliding. The catch is the full cure. You need to wait 24 hours before wearing the clip, or the bond pops under tension. For embellishments that sit on top of a base, Beacon Power-Tac is the glue that keeps coming up.
Polymer clay needs an oven, not patience. You bake it at 275°F until it hardens, then glue the cooled shape to a metal clip base. The material holds fine detail and stays rigid, which makes it the right pick for sculpted shapes like flowers or hearts.
Sewing is slower but handles fabric bows and layered ribbon builds. You cut lengths, fold and knot them into shape, then tack the knot to the clip with a dot of hot glue. The string and ribbon do the structural work; the glue just keeps everything from flopping.
| Technique | Best for | Key limit |
|---|---|---|
| Hot glue | Quick assembly, embellishments | 24-hour cure before wear |
| Polymer clay (275°F) | Sculpted, durable shapes | Requires oven + cooling |
| Sewing | Fabric bows, layered ribbon | Slower, needs hand work |
For a bow with tails that stay put, sewing wins. For a gem-covered barrette you want done tonight, glue works if you plan around that full day of curing.
Making Clips Your Own
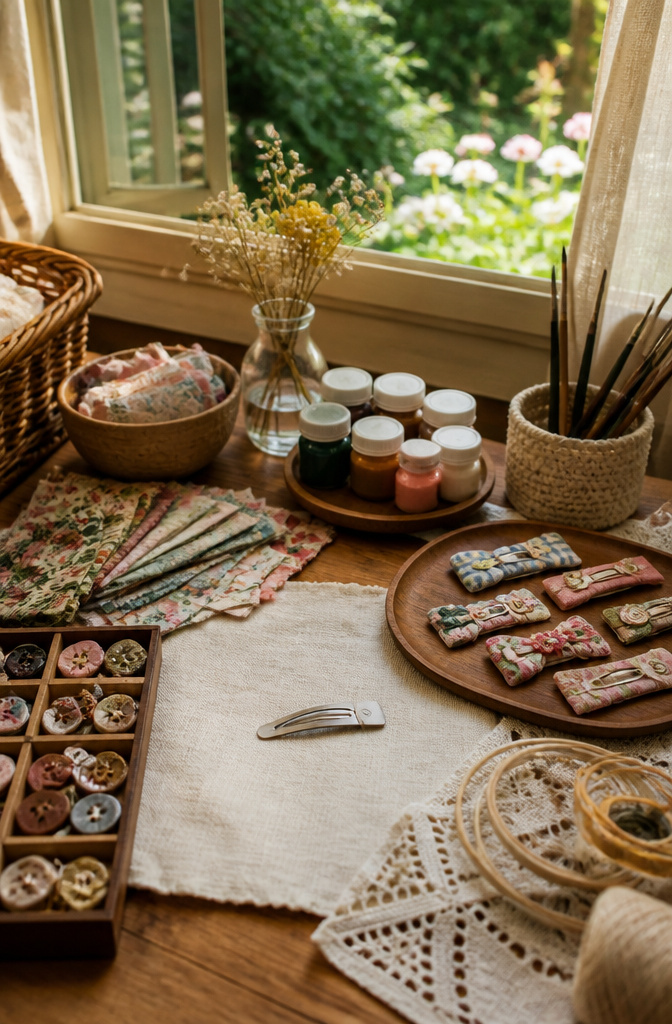
A basic clip becomes yours the moment you add something that already lives in your drawer. Vintage buttons, a single earring whose partner disappeared years ago, or fabric scraps from a favorite worn-out shirt all work. Glue a mismatched button to a simple barrette and the clip suddenly matches a cardigan you have owned for a decade.
Color palettes are another easy route. Pick two or three tones you wear repeatedly and paint or wrap every clip in that scheme. The result reads as intentional rather than random.
Monogramming takes almost no skill. Small letterboard letters, about half an inch, press onto pins with a dab of E-6000 or super glue. Cut off the little legs on the back first with an X-Acto knife so they sit flat. Spell out a name, a single initial, or a short word like "ciao" or "yay." These make quick gifts because they feel specific to the person wearing them.
Seasonal themes keep the project from stalling. A tiny silk flower clipped to a base in August becomes a miniature felt pumpkin by October. The hardware stays the same; only the decoration changes.
Matching an existing wardrobe piece is simpler than it sounds. Hold the clip material against the garment in daylight before you commit. If the tones clash even slightly, swap the material or paint it a shade darker.
Frequently Asked Questions
What type of glue is best to glue the barrette holders to the barrettes?
A multi-surface glue works best, since you are attaching a rubber-like material to metal. A gel super glue is a solid option too. Whatever you choose, give it a full day to cure before you wear the clip, or the bond will pop under tension.
How do you make a DIY bow clip?
Cut 55 to 60 inches of ribbon at least half an inch wide, fold both ends toward the middle so they overlap into a loop, then pinch the center and secure it with thread or hot glue. Wrap a smaller ribbon strip around the center to hide the gathers, and attach the finished bow to an alligator clip or barrette with hot glue.
Can I use the liquid clay for other DIYs as well?
Yes. Sculpey liquid clay works for Croc charms, jewelry, home décor, and scrapbooking projects too. It is not limited to hair clips.