These 18 ideas run from a five-minute bubble braid to a mapped geometric updo that eats a whole Saturday morning.
The deciding factor is how long your child can sit still, how many days you need the style to hold, and which of these looks matches her patience level and your morning bandwidth.
1. Double Dutch Braids
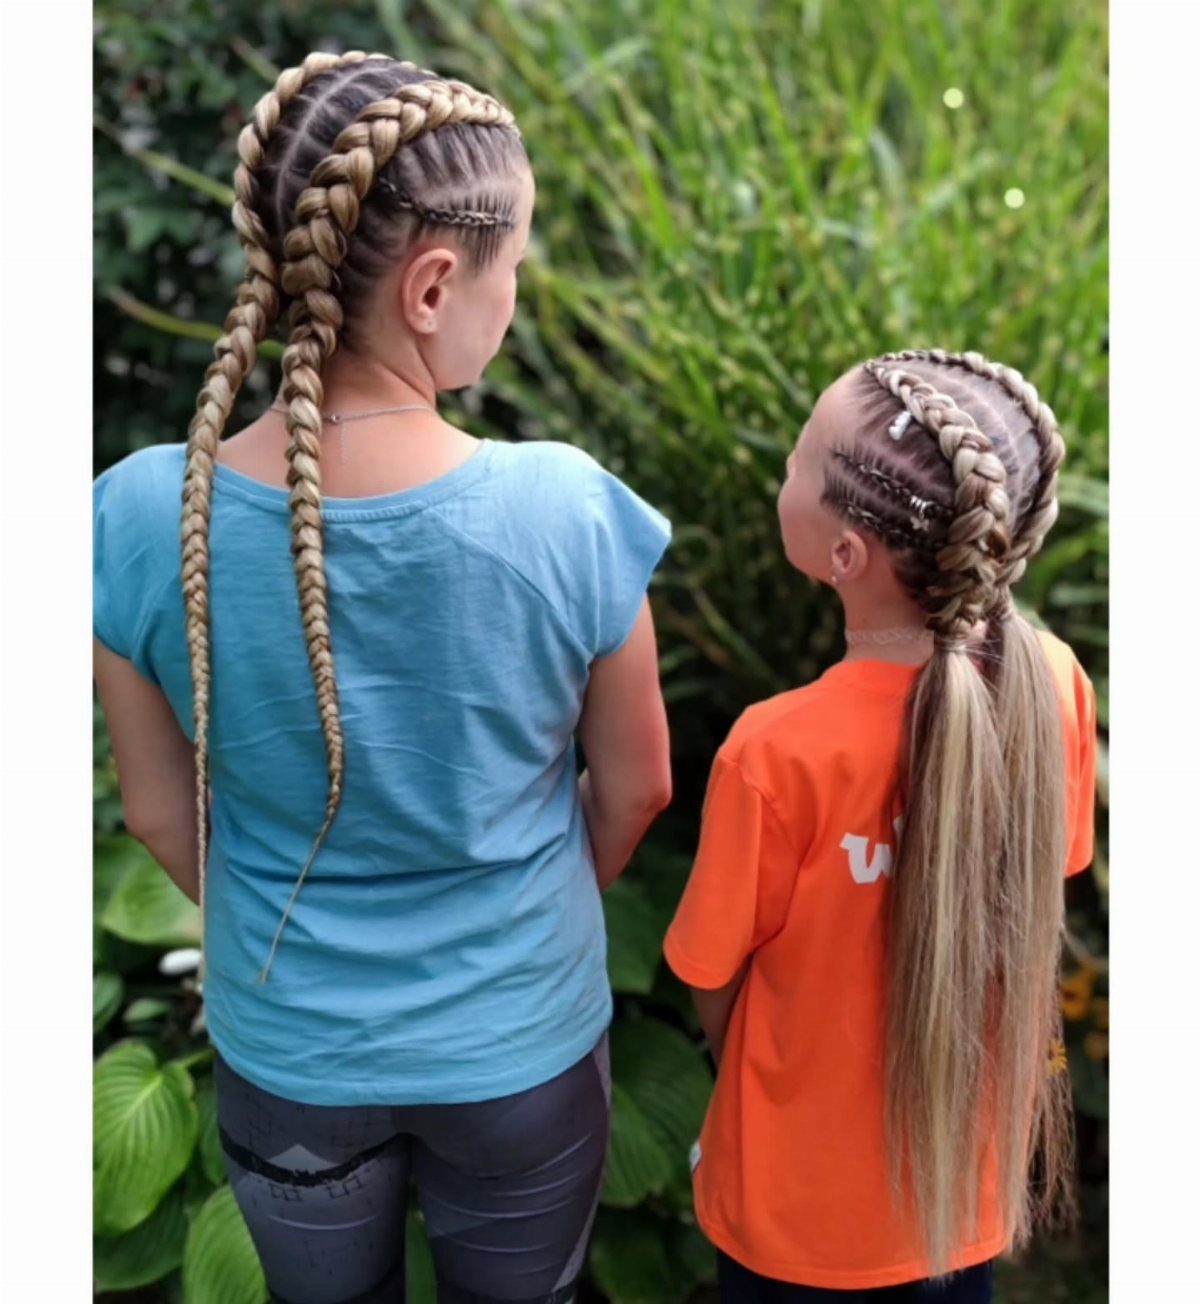
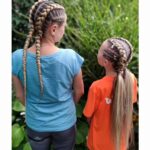
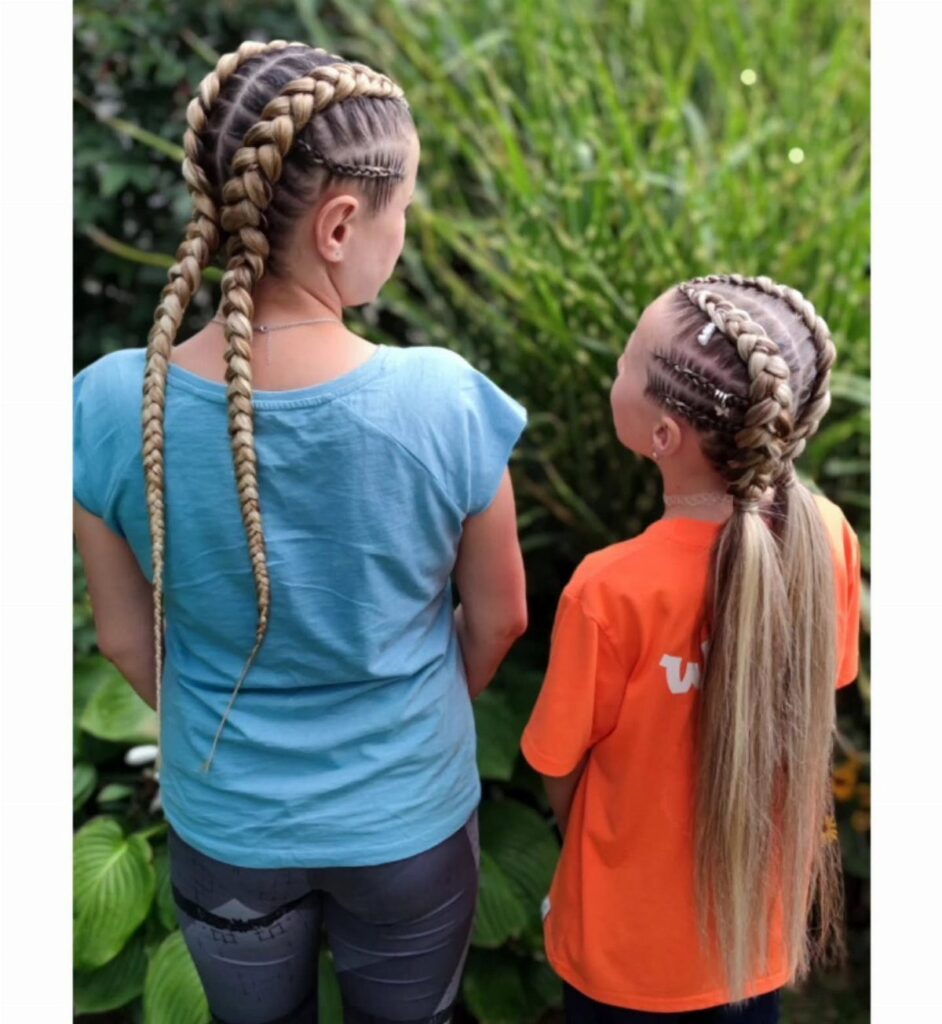
Double Dutch braids run from the hairline straight back, each section crossing under the middle rather than over so they sit raised on the scalp.
I like this style for kids who play hard because the braids grip tight and do not loosen as the day goes on.
The technique takes some practice if you are used to standard three-strand braids; your fingers work opposite to what feels natural at first.
Once you get the rhythm, though, it moves fast and the result looks polished enough for school photos while holding up through recess.
2. Cornrow Braids
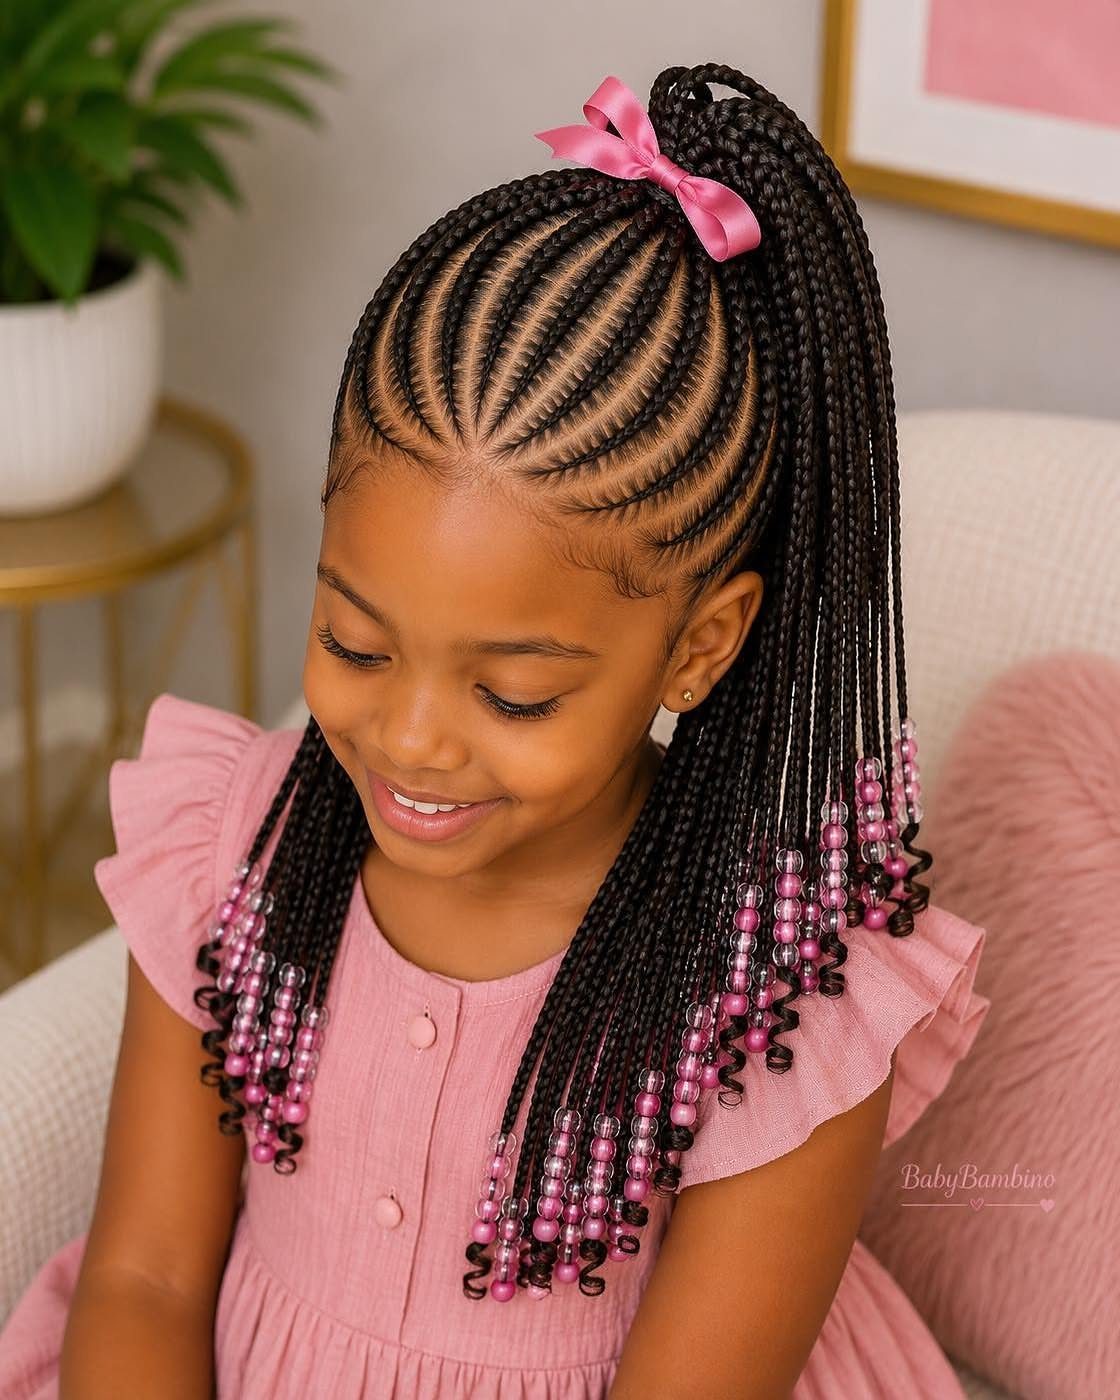
Cornrows follow the scalp in straight lines or simple curves, braided flat and close so the hair stays protected underneath.
This version gathers into a high ponytail with beads and a bow, which gives a little personality without adding much morning time.
I would start with clean, detangled hair and a light oil on the scalp; the style lasts longer with a satin bonnet at night.
The beads slide on after braiding, secured with small elastic bands or by looping the final inch of braid back through.
3. Long Box Braids
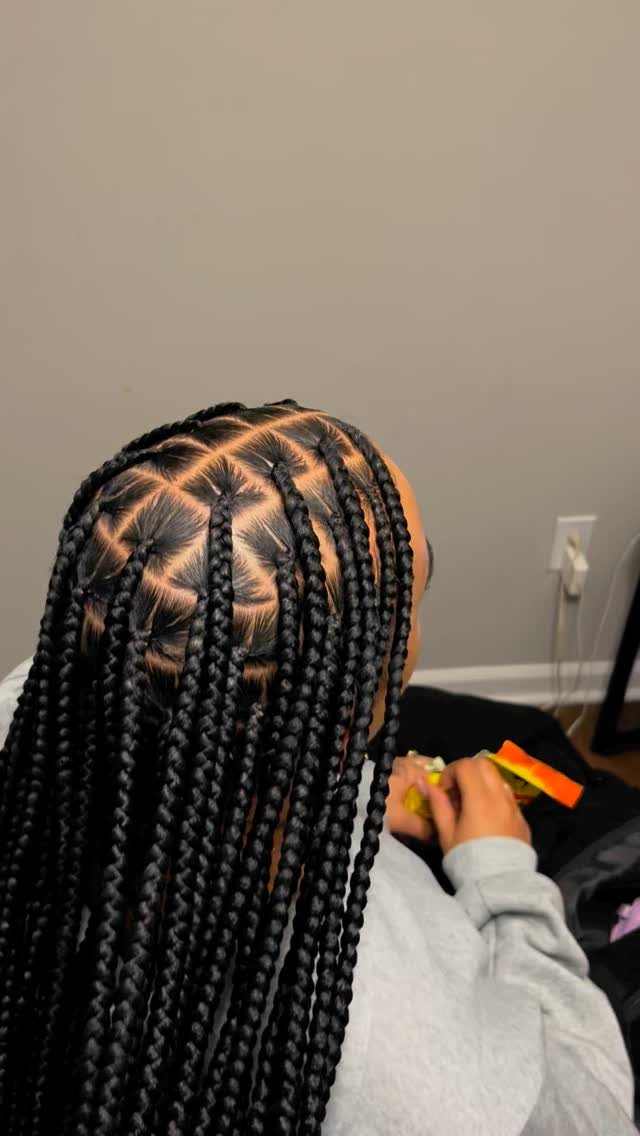
Long box braids divide the hair into square-shaped sections, each one braided from root to tip with extension hair added for length and fullness.
What I appreciate about this style for busy parents is the low daily maintenance; once installed, the morning routine drops to almost nothing. The square parting is the detail that matters, so take time mapping the grid before you start.
A rat-tail comb and some patience get you there. These braids hold up well for a good stretch with proper care.
4. Braided Double Buns
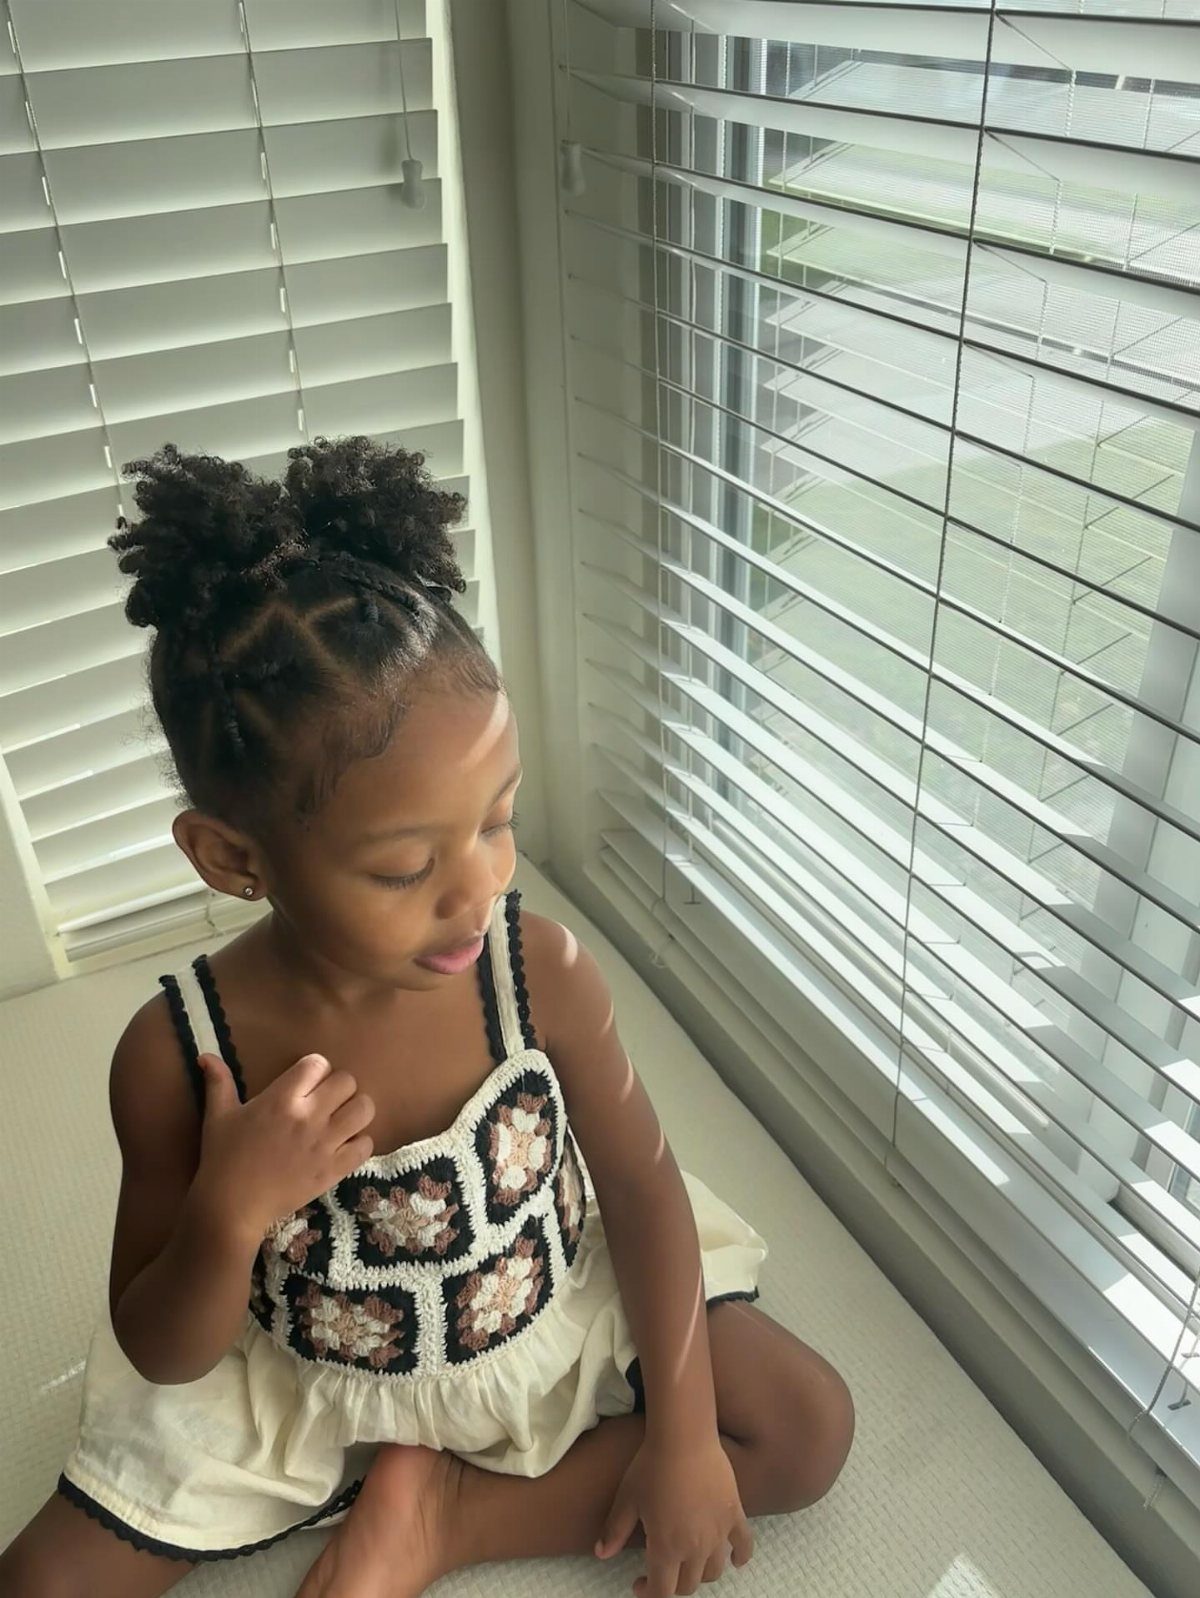
Braided double buns start with cornrows or flat twists directed toward 2 high points on the head, then coil the remaining length into small, neat buns.
This shape stays out of the face completely, which I find ideal for art class, gymnastics, or any day with a lot of looking down.
The buns sit lighter than one large bun at the crown, so there is less pulling on tender scalps. You will need small elastic bands and a few bobby pins to secure the ends.
5. Bubble Braids
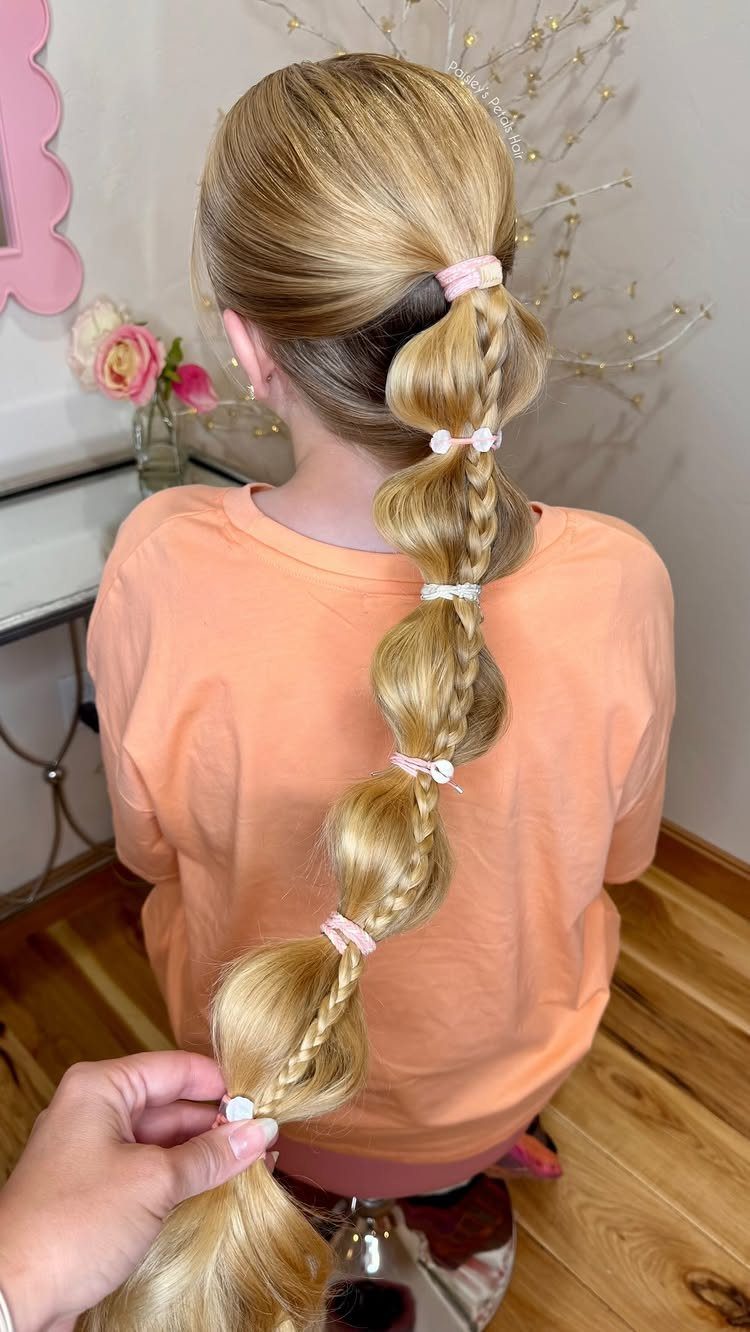
Bubble braids work by gathering a ponytail or pigtail at intervals with small elastics, then tugging each section gently outward to create round, puffed segments.
The result looks like a braid but takes a fraction of the skill; I reach for this when I want something decorative before the school bus arrives.
Space the elastics apart depending on hair length, and use clear or colored bands to match or contrast. A little texturizing spray beforehand helps the bubbles hold their shape.
6. Pigtail Hairstyles
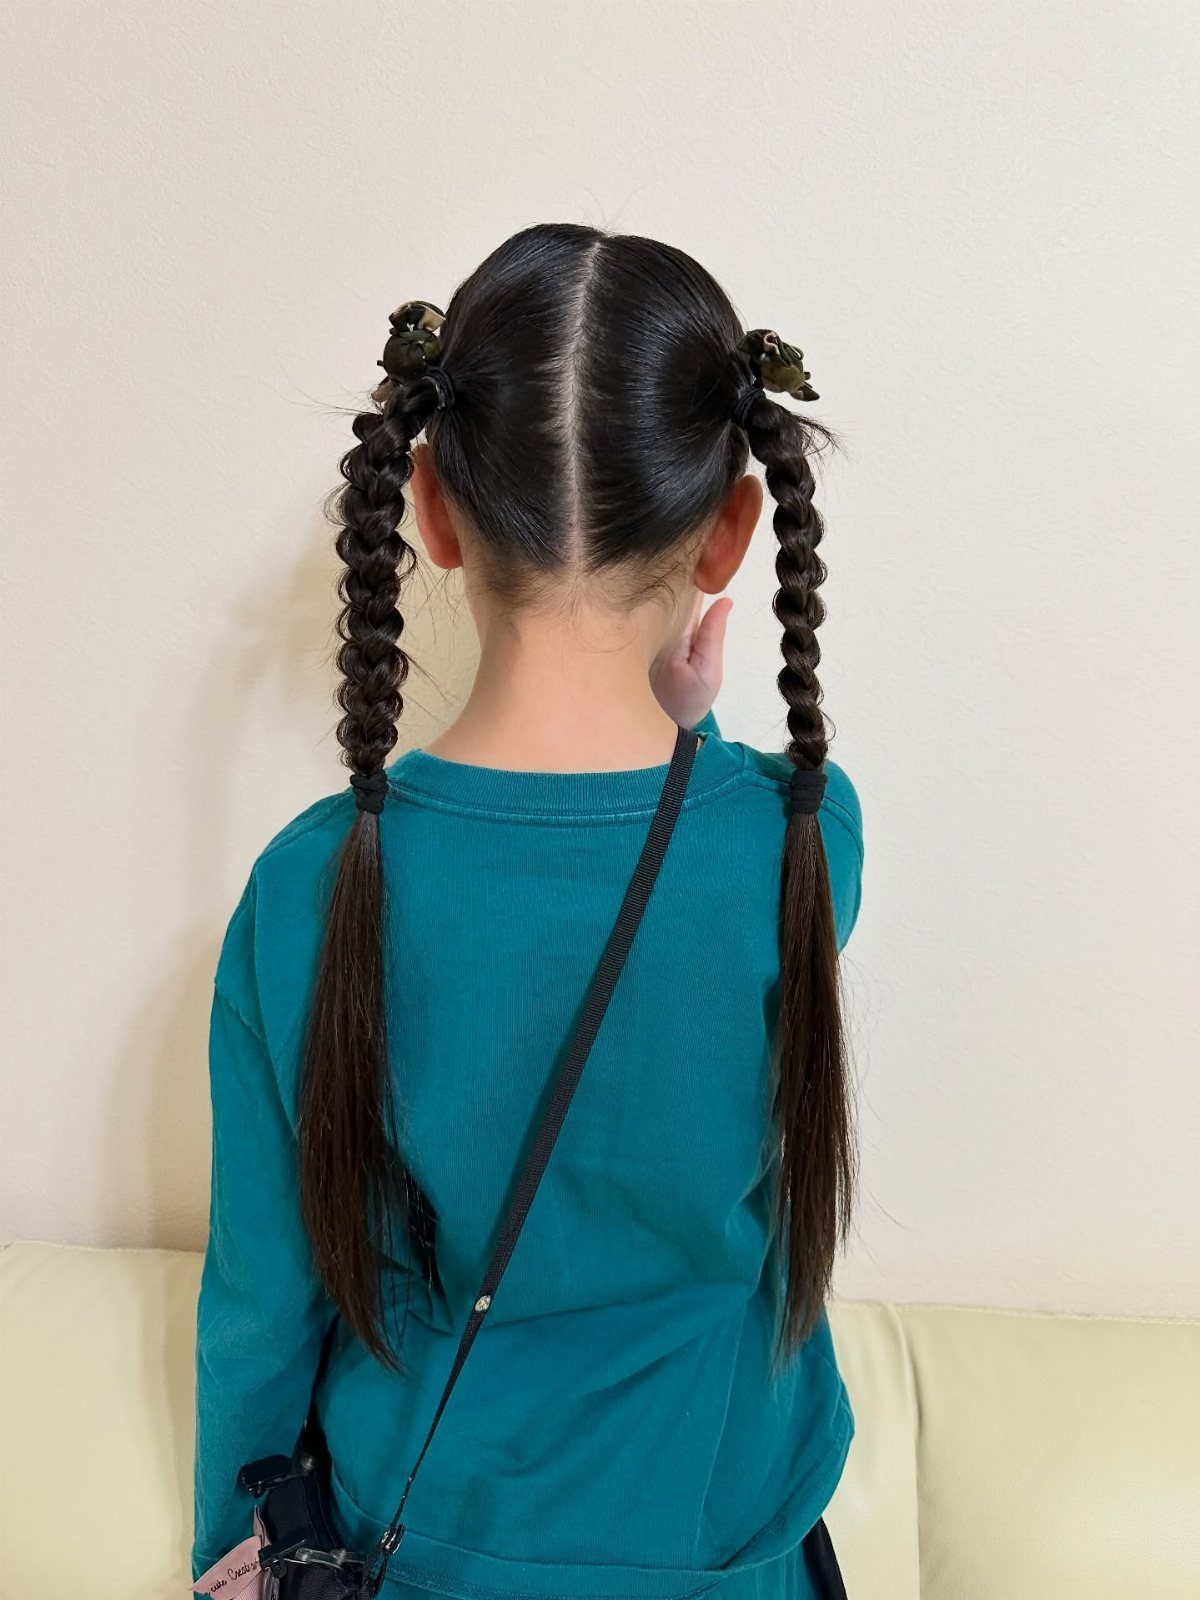
Pigtail hairstyles split the hair in two, with each side braided separately down or across the back.
This is the style I would teach a child first if they wanted to learn braiding themselves; the sections are manageable and mistakes do not unravel the whole head.
For active days, braid closer to the scalp at the top so loose hair does not fall forward. A simple three-strand braid works fine, or you can rope braid for faster results with a similar neat look.
7. Heart Braid
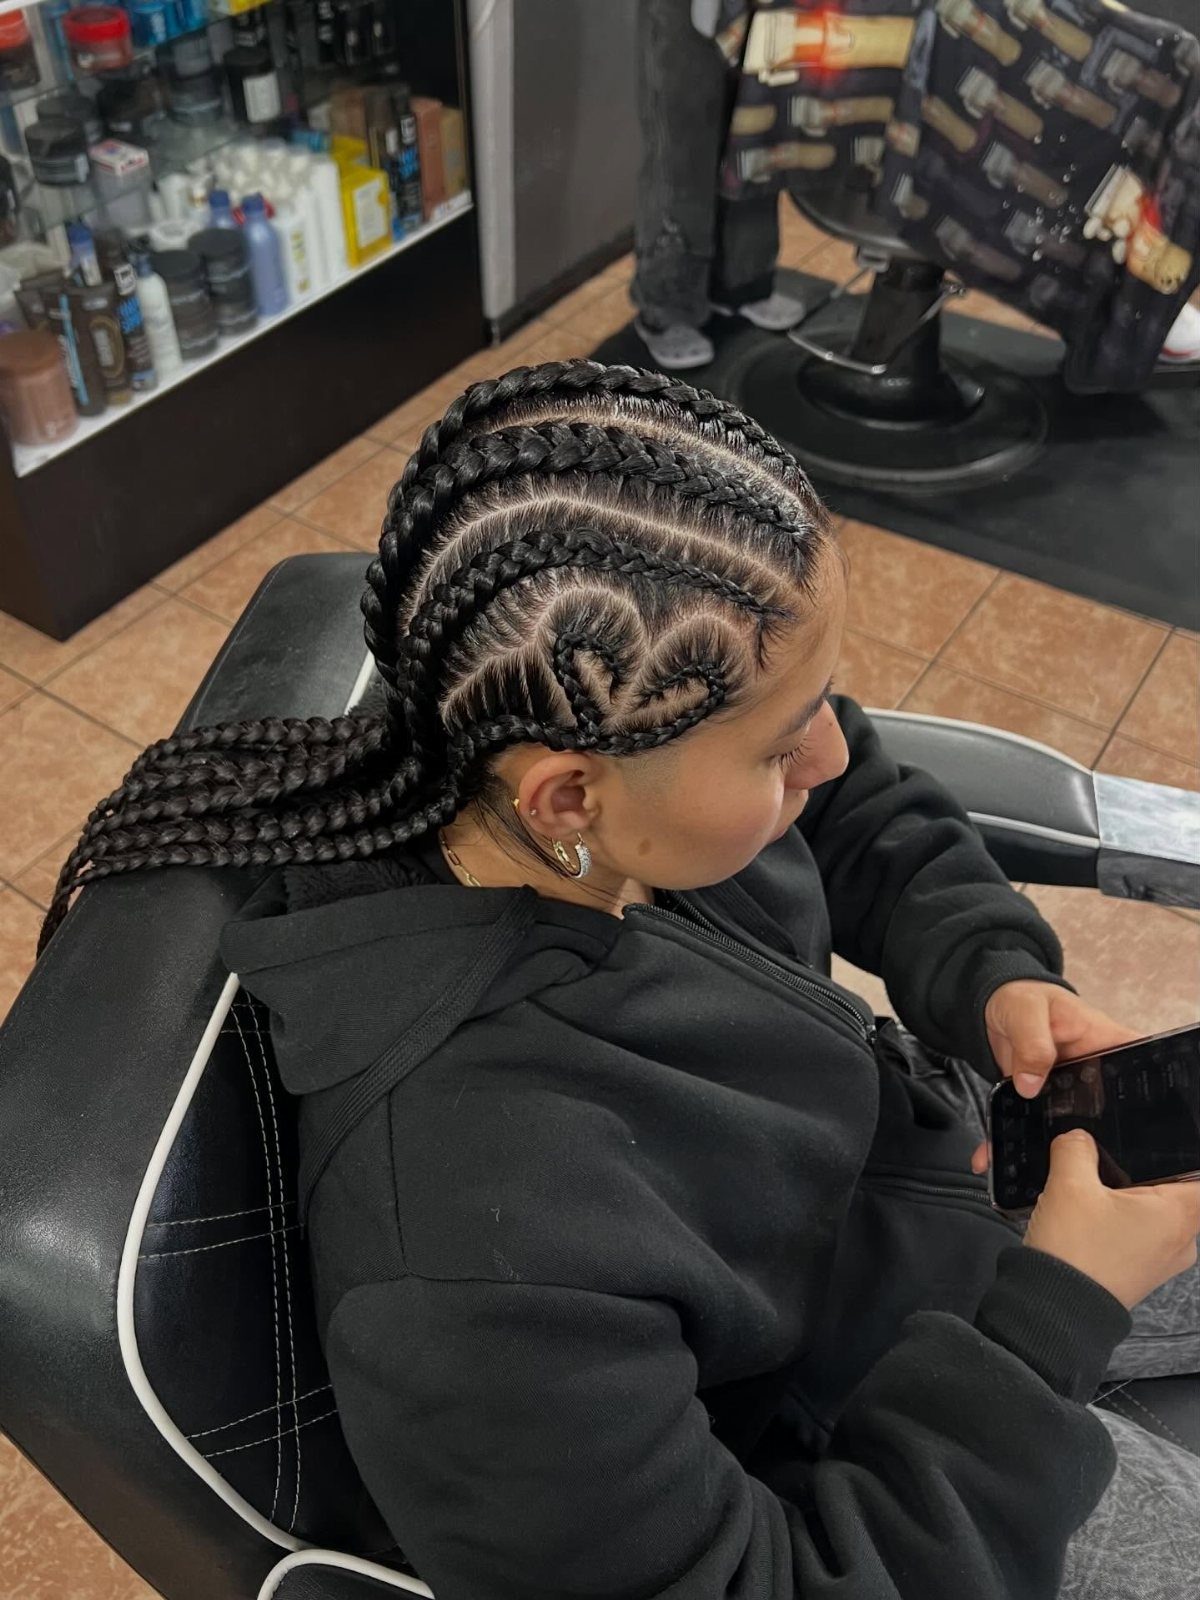
A heart braid shapes a cornrow into a curved outline on the side of the head, then continues the remaining length into standard braids down the back.
I would save this for birthdays, recitals, or any day that calls for something extra; the shape reads clearly from across a room and photographs well.
The cornrow base keeps it secure, so it lasts through cake and running around. Drawing the heart freehand takes a steady hand, so I would map it with a tail comb first.
8. Braids with Beads
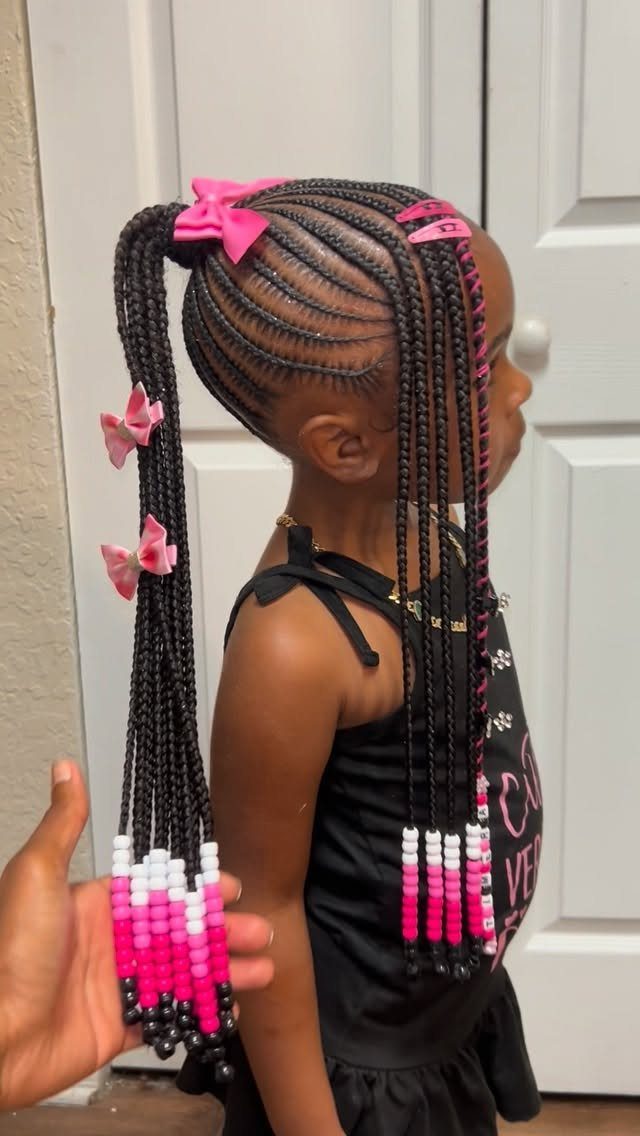
Pink, white, and black beads with matching bows turn a simple ponytail into something that looks intentional without taking extra time in the morning.
I like that kids can pick their own color story and feel some ownership in the result.
Lightweight plastic beads work best for younger children; heavier ones pull and swing too much. Swap them out when the mood changes, or remove them before bed to help the style last longer.
9. Zig-Zag Braided Updo
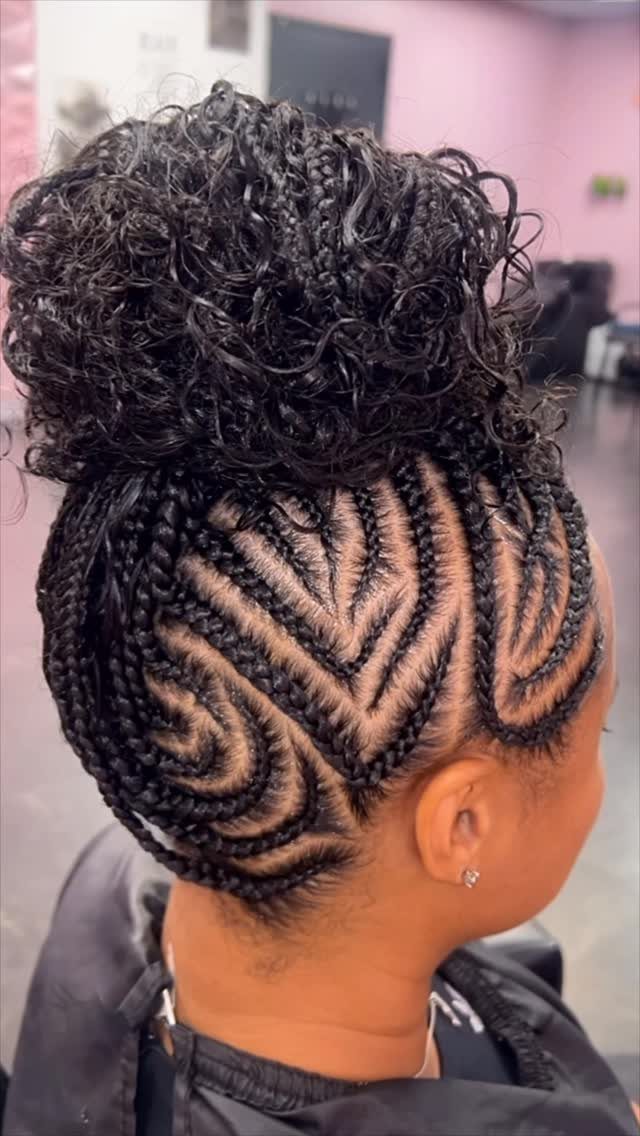
Zig-zag cornrows follow a sharp, angular path across the scalp before gathering into a high curly bun. The pattern itself is the statement, so I would keep the bun simple and let the parting do the work.
This style suits a child who can sit still for the extra time the pattern demands; each angle needs attention or the lines go soft.
A curl-defining product on the bun portion keeps the texture consistent with the precision of the braids. I would plan this for a weekend morning rather than a rushed Tuesday.
10. Triangle Box Braids
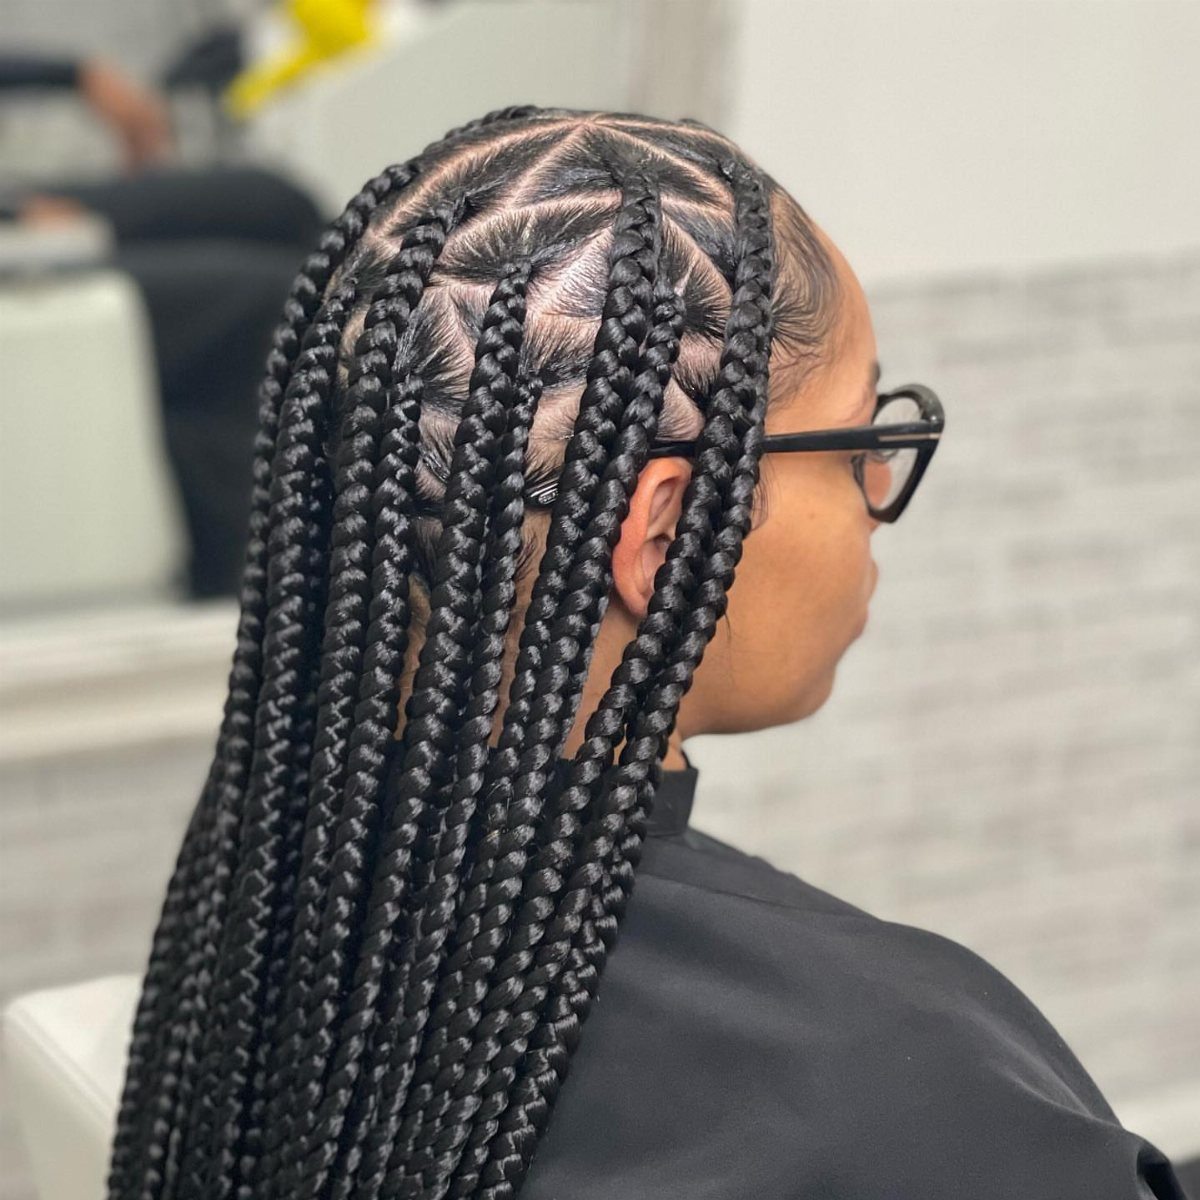
Triangle box braids replace the square grid with three-sided sections, the points alternating direction so the scalp shows a tessellated pattern.
The change is subtle from a distance but adds visual interest up close, and I find the parting actually faster to mark than perfect squares once you get the rhythm.
A rat-tail comb with a metal tip helps score the lines cleanly. The braiding itself proceeds the same way as standard box braids, so no new technique to learn, just a different map at the start.
11. Lemonade Braids
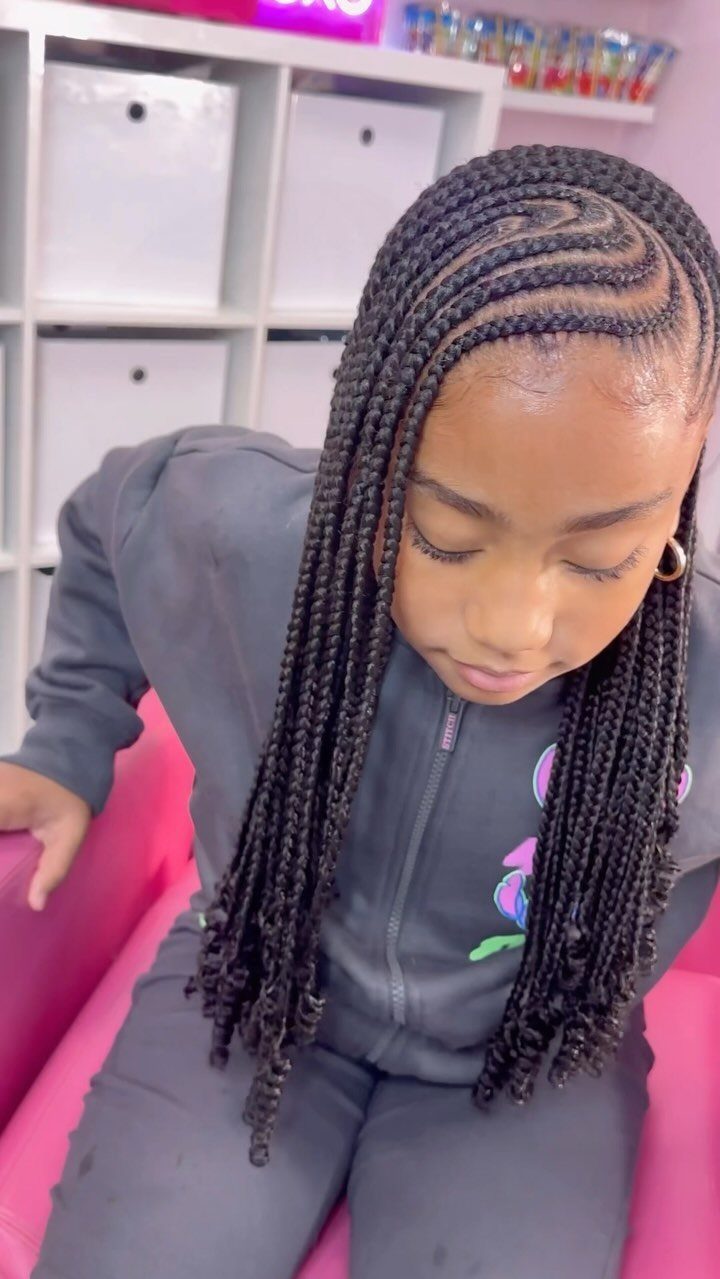
Lemonade braids sweep from one side of the hairline across the head in multiple side-swept cornrows, then hang loose past the shoulder.
The asymmetry flatters most face shapes and keeps hair off one side completely, which I find practical for car seats and shoulder bags.
This version runs long, but the style works cropped to shoulder length too if that suits your child better.
The side part needs to sit firm or the sweep loses its shape, so I would anchor the first inch with a small braid-in elastic before continuing.
12. Braided and Twisted Updo
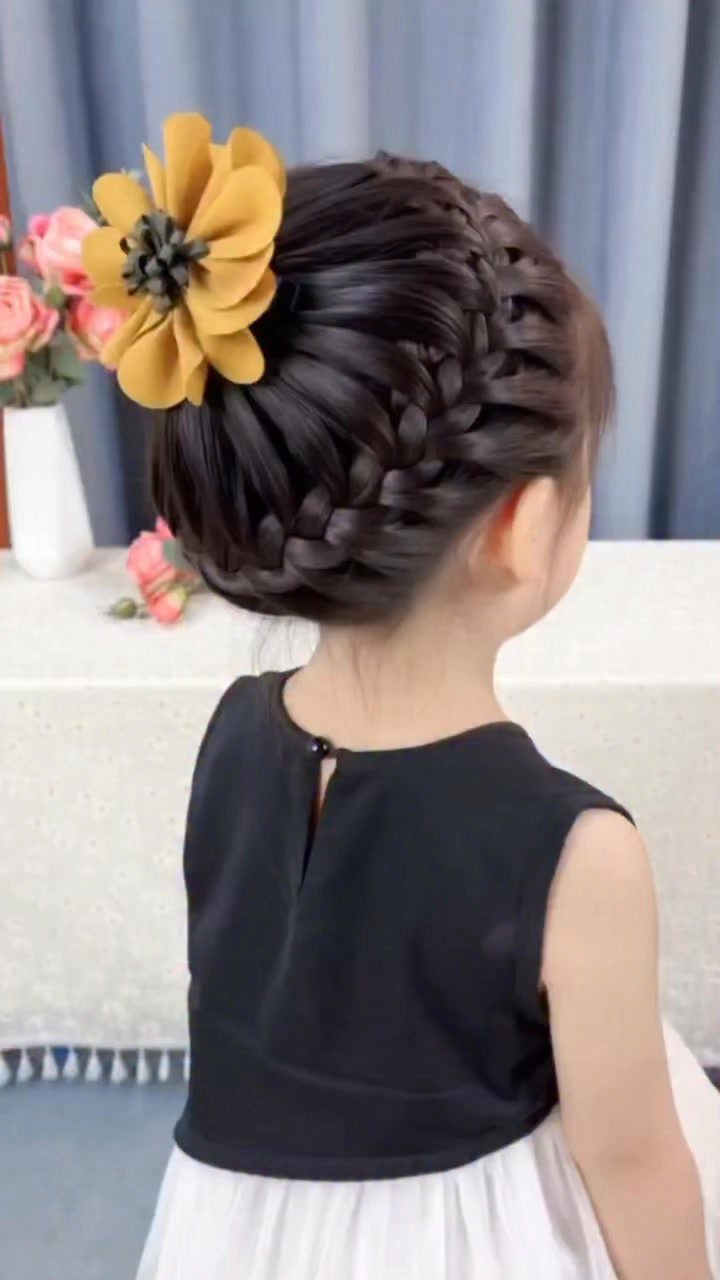
A braided and twisted updo interlocks 2 techniques, the braids providing structure at the base and the twists adding volume and texture as they coil upward.
One large accessory finishes a complex updo best when it is lightweight and clips in securely; a heavy piece will slide out and fight the braid work underneath.
This is not a quick morning style, so I would reserve it for weddings, graduations, or photo days when the time investment pays off.
Work with day-old hair for better grip, and mist with water as you go to keep flyaways smooth.
13. Side Dutch Braid with Ribbon
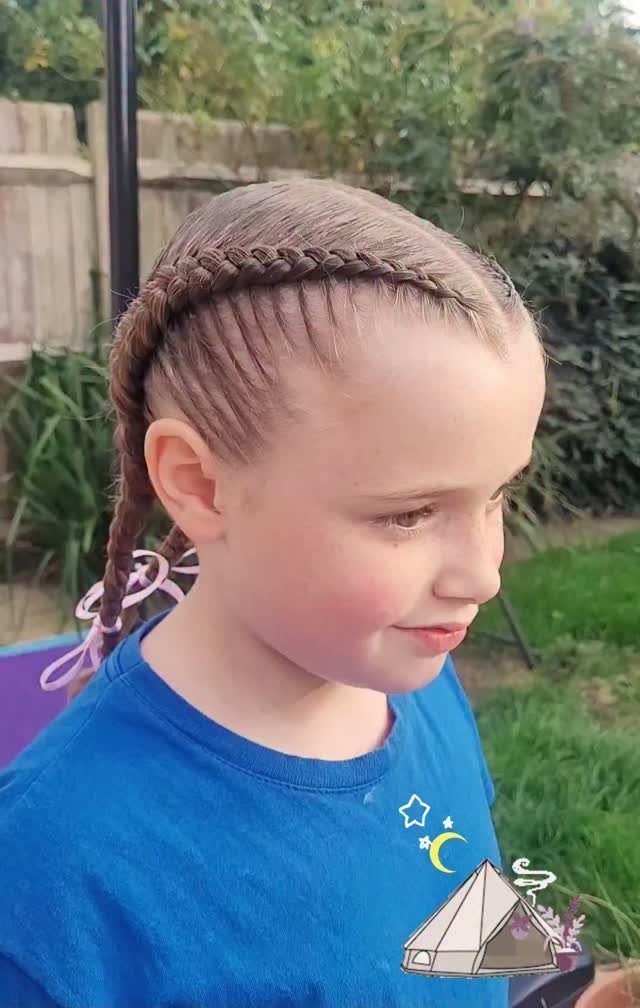
A single side Dutch braid sweeps from one temple down past the shoulder, tied off with a ribbon rather than a plain elastic.
I like this for mornings when you want one polished element without braiding the whole head, and it goes faster if the hair is already detangled.
The Dutch technique, with sections crossing under, gives the braid that raised, rope-like look that sits nicely against the scalp.
Thread a ribbon through the final elastic and tie a small bow, or weave it through the braid itself for more color. Pink ribbon reads cheerful against darker or lighter hair alike.
14. Cornrow and Loose Curls
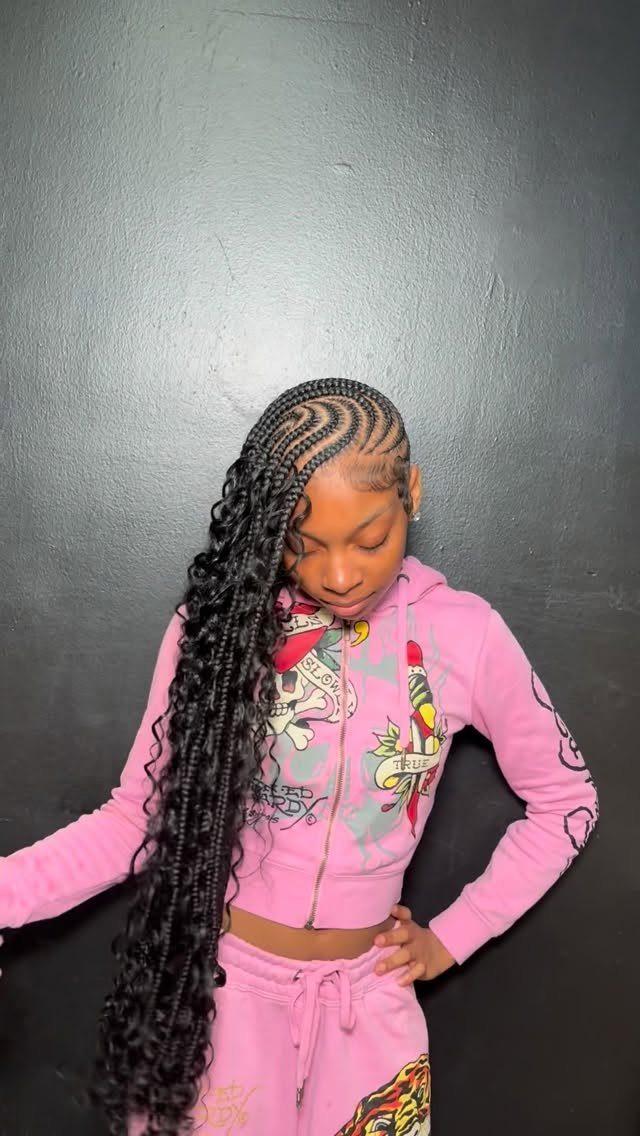
Cornrows braided close to the scalp from the front give way to loose, curly length that moves freely past the shoulders.
This mix of structured and soft works well for kids who want the neatness of braids without giving up all their volume.
I would keep the cornrow section to the top third of the head so the transition point does not sit too low and create a heavy line.
A light curl cream on the loose ends keeps the texture defined without crispiness. The style lasts better if you sleep with the curly portion in a loose pineapple or satin scarf.
15. Twisted Braids with Geometric Parts
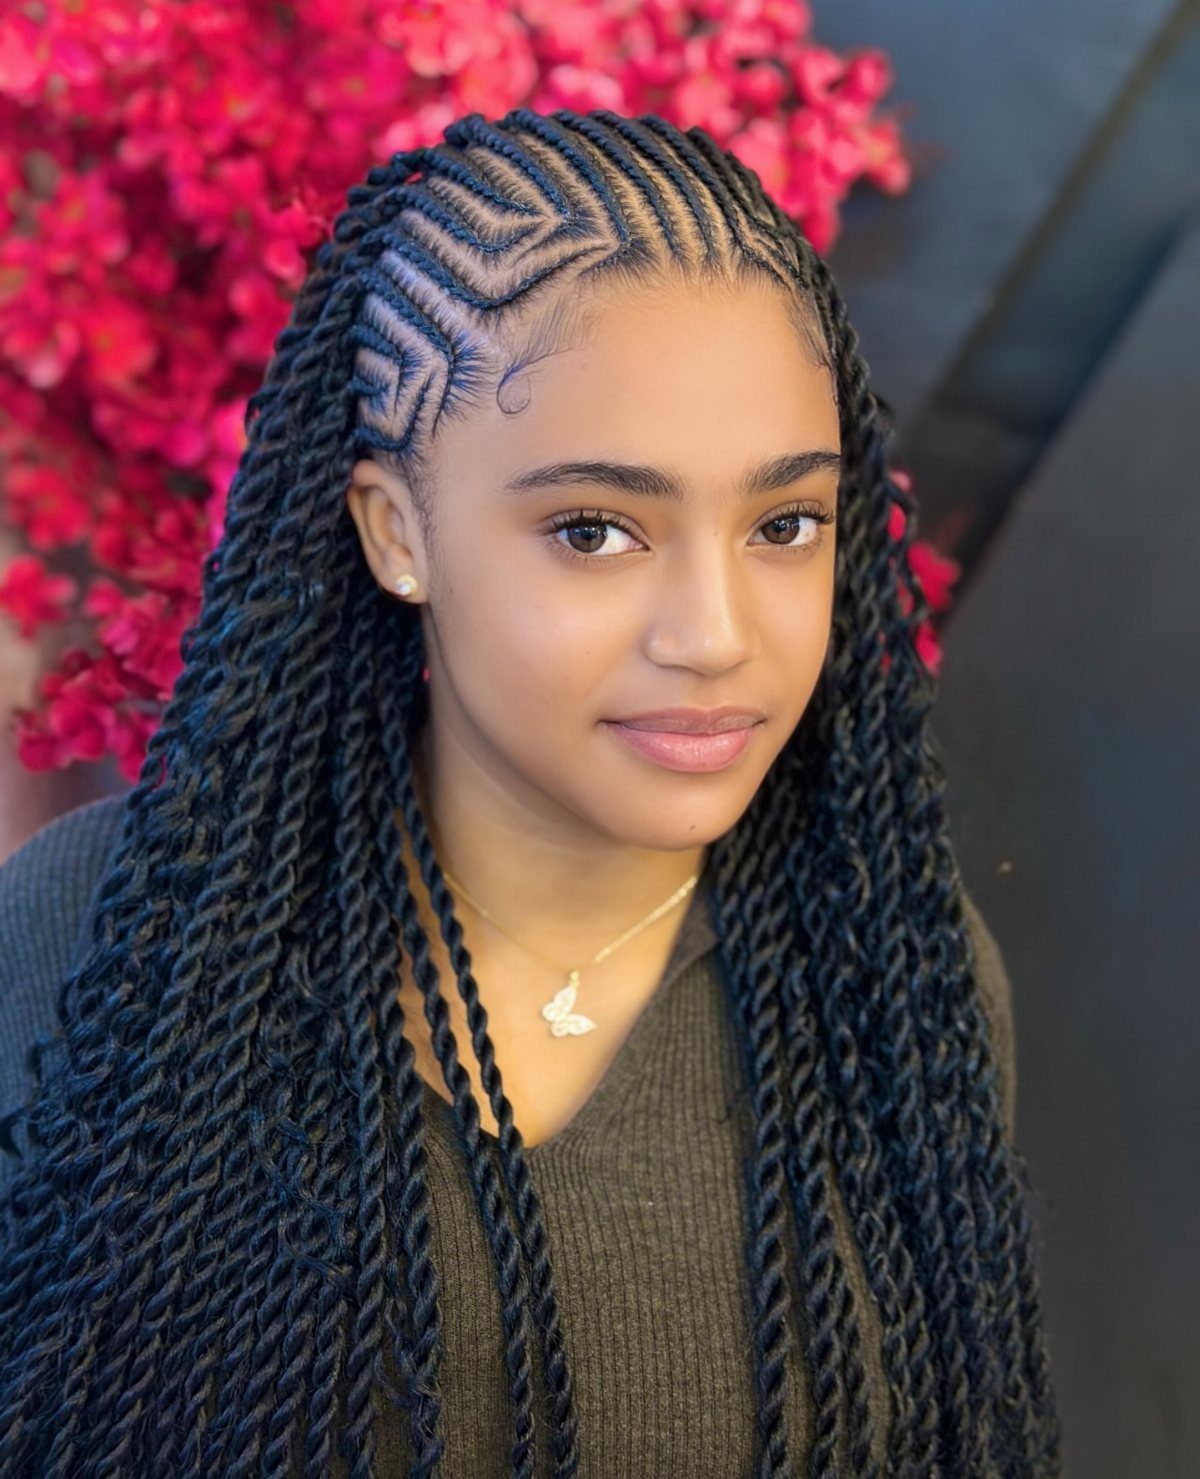
Rope twists paired with sharp geometric parting turn a protective style into something that reads intentional from every angle.
The scalp pattern matters as much as the twists themselves, so I would block out time for mapping before you start braiding.
A metal-tipped tail comb scores clean lines; triangle, diamond, or chevron shapes all work as long as they repeat with some rhythm.
The twisting technique is simpler than three-strand braiding once you get the two-strand rotation down, which makes up for the extra minutes at the parting stage.
16. Braided Flower Design
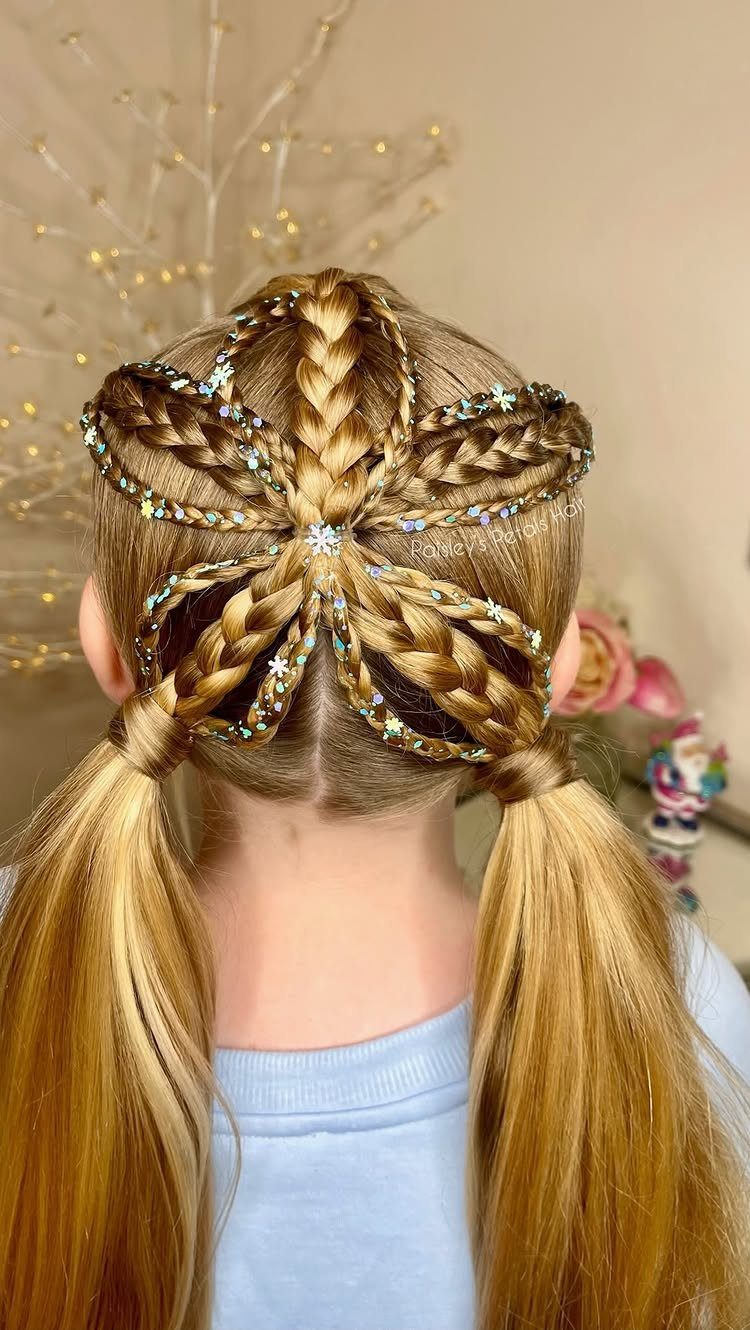
Small braids radiate from a center point at the crown and coil into a floral shape at the back, pinned or tucked to hold the petal curves.
Glitter stars pressed at the center finish the look without adding weight. I would start by making a small ponytail at the crown, braiding thin sections outward, then pinning each braid into a loop so the ends hide underneath.
This style works best on hair that has some grip; freshly washed silkiness makes the loops slide. Save it for a day with extra time, since the pinning takes patience to get symmetrical.
17. Low Braided Bun with Pearls
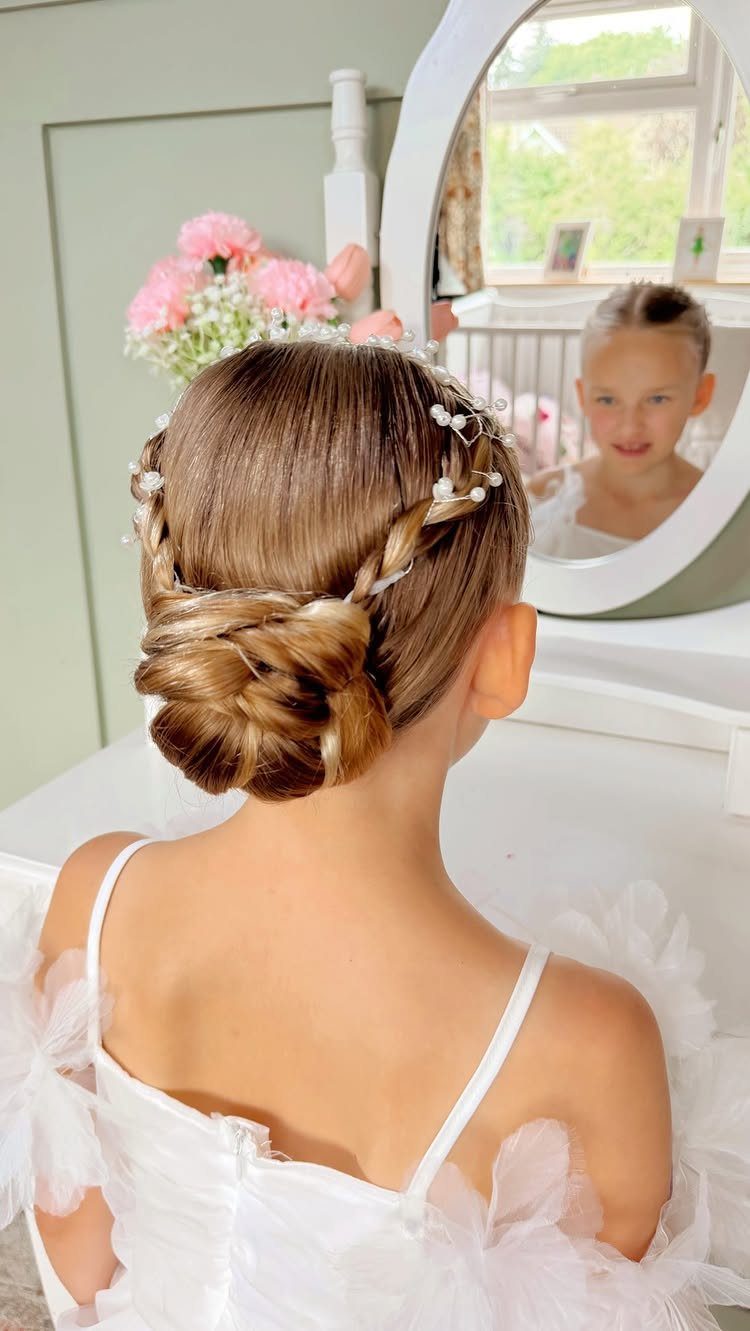
Side braids sweep back and join into a single low bun at the nape, small pearls threaded along the braid lines for a quiet, dressed-up effect.
The placement keeps the weight low, so there is less pulling than with a high style, and the pearls read special without looking costume.
I would secure the bun with pins in an X pattern so it does not loosen during a long day.
This one suits occasions where you want something that photographs softly, a recital or a family gathering. The pearls can be sewn onto thread first for easier removal when the style comes down.
18. Half-Up Dutch Braids
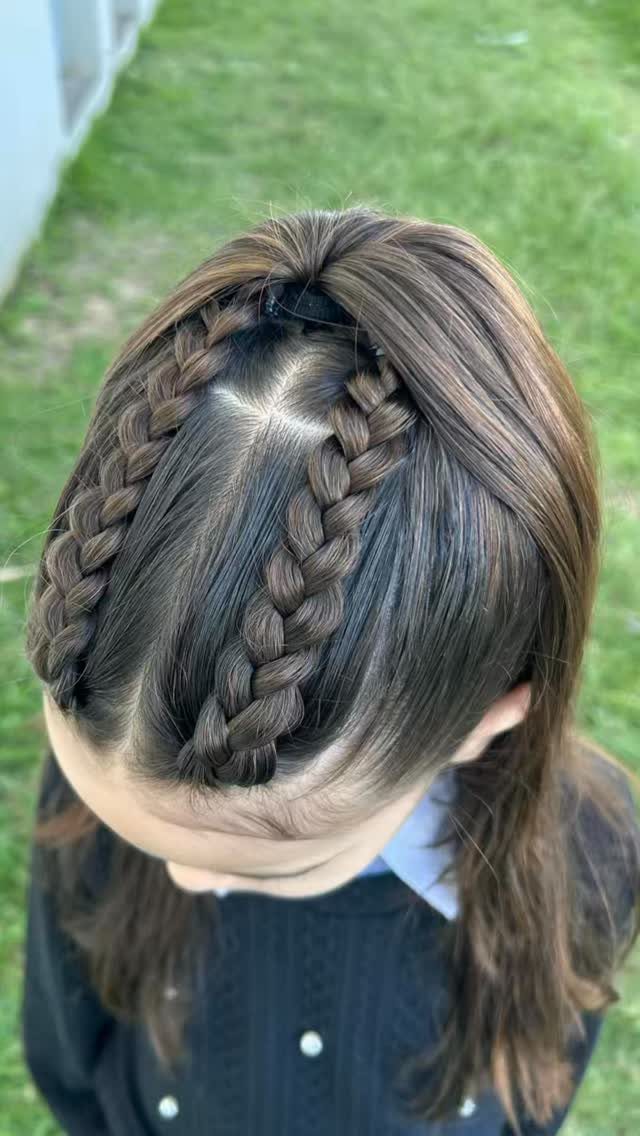
2 Dutch braids run from the hairline to the crown, where they meet and tie, leaving the rest of the hair loose down the back.
I reach for this when I want the hair controlled around the face but still free to move. The half-up shape suits medium to longer lengths; on shorter hair the loose portion can look sparse rather than flowing.
A small clear elastic at the join keeps the gather neat, or you can tuck the ends under for a cleaner finish. The Dutch technique gives the braids that raised, almost cable-knit texture that stands out against smoother hair below.
Benefits of Braids for Kids
Braids solve a few problems at once for parents. The hair stays put through recess, nap time, and whatever else a school day throws at it, so you are not re-doing a ponytail at lunch.
Tangles drop off sharply because the strands are bundled rather than rubbing against coats and car seats, which matters more in dry winter air when static runs high.
Once you get the motion down, a basic braid takes under 5 minutes, and the more complex styles buy you days or weeks of almost no morning work.
That durability also means less manipulation overall, which protects hair that is still growing in strength and density.
Tips for Easy Braiding
Slightly damp hair makes braiding easier. The moisture weighs down flyaways and keeps sections from drifting, so if you are not working right out of the bath, a spray bottle with water or detangler does the job.
A good detangling spray matters for takedown too; it softens buildup at the roots and keeps you from pulling hair out when you unravel.
Work in a leave-in conditioner before you start if the hair will be braided for more than a few days, and follow with a light oil to seal without greasiness.
A gentle holding spray can tame the surface, though I would skip anything stiff on a child. Human braiding hair gives the most natural look and feel if you are adding length.
Choosing the Right Style
Hair texture decides what will hold and what will stress the strands. Fine, straight hair usually needs more grip, so day-old hair or a touch of texturizing spray helps Dutch braids and bubble styles stay put.
Coarser or tightly coiled hair takes protective styles like box braids or cornrows beautifully and keeps them longer, though the scalp still needs moisture underneath.
Consider how long the style must last. A quick school morning braid does not need the same investment as a style meant to carry through a full stretch of camp.
Your child’s patience matters too; some patterns need a still sitter for a good stretch, and no style is worth a morning fight if the timing is wrong.
Frequently Asked Questions
How long can braids stay in a child’s head?
Tight braids against the scalp should come down within two to four weeks, and even looser braids need to come out before they start matting at the roots.
A satin bonnet at night stretches the style and a few drops of oil on the part lines keeps the skin underneath from drying out.
I would check the edges and part lines as the weeks pass; any redness or tension means it is time to take them out regardless of the calendar.
Are there specific braid styles suitable for different hair textures?
My niece’s fine hair slips right out of braids unless I work with hair that has some grip to it, so second-day strands or a spritz of dry texture spray keeps Dutch braids and bubble ponies from sliding apart by lunchtime.
Most styles can work across textures with the right prep and products, but matching the style to what the hair naturally does well makes the result last with less fighting.