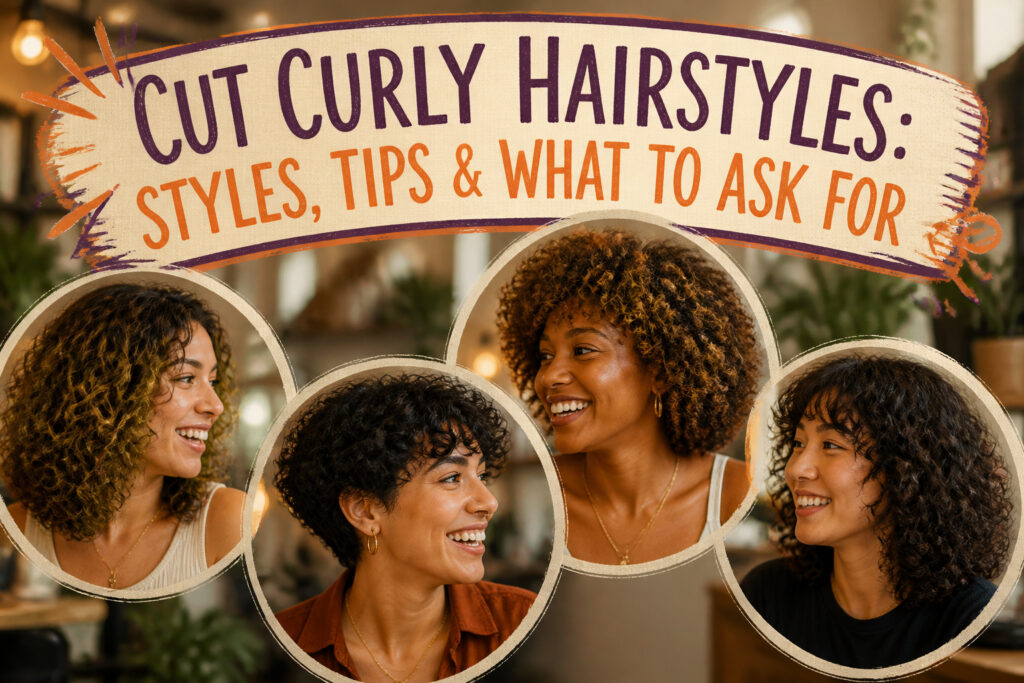
In 2026, a curly cut works only when your stylist sees the spring your hair has dry, not wet. Water stretches curls two to four inches past where they land, so the cut that looked right at the shampoo bowl turns into a shape you never agreed to. The DevaCut builds shape curl by curl in dry hair; Ouidad starts wet, then dries and checks before finishing.
1. Curly Bob
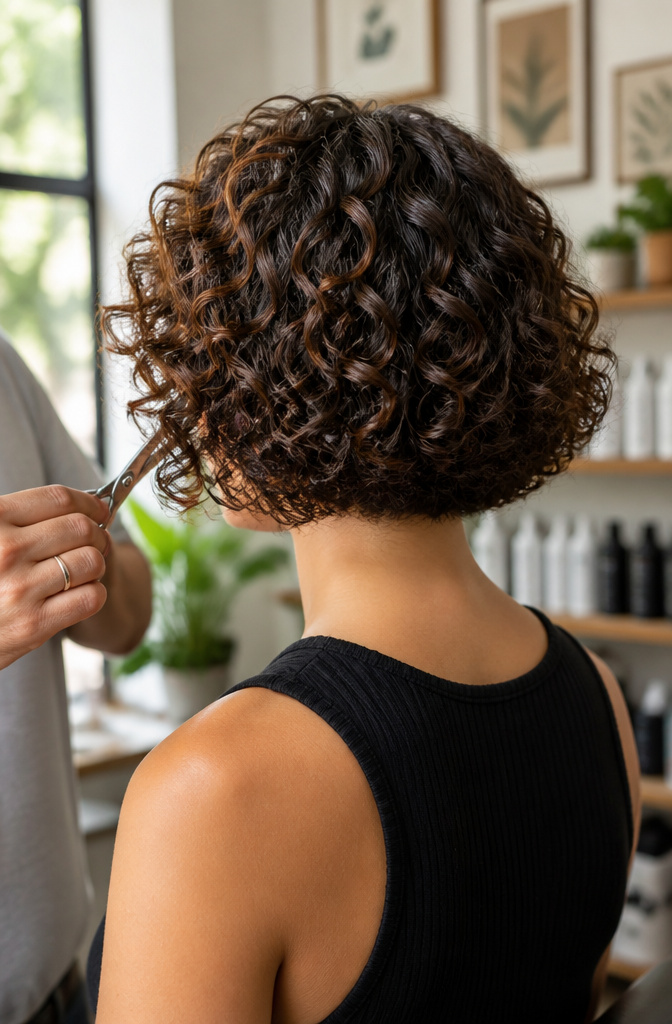
A blunt or softly angled perimeter gives medium to tight curls the structure they need without forcing the hair to fight its natural pattern. The weight line sits right at the jawline or just below, which means the curls stack and bounce instead of stretching out into loose, undefined waves.
Most people I talk to who land on this cut have spent years growing their hair out, thinking length equals control. Eventually the weight pulls the curl pattern flat at the root and the ends look straggly no matter how much product goes in. Cutting to a bob removes that downward drag, so the spring comes back immediately.
The classic straight-across shape works, but a slight angle, shorter in back and grazing the collarbone in front, keeps the silhouette from going triangular. That rounded shape is what stops the dreaded pyramid effect that happens when curls are cut too bluntly with no layering. Ask your stylist to cut with the curl in its natural formation, dry or damp, so the perimeter falls where it actually lives rather than where it stretches when wet.

4/27# Highlight Deep Wave BOB Wig Human Hair Material:The Highlight Deep Wave BOB Wig Made Of Unprocessed Brazilian 100% Human Hair,Soft & Pure,220 Density Virgin Hair Wigs,Full & Thick,No Shedding & No Tangle,Can Be Dyed & Bleached
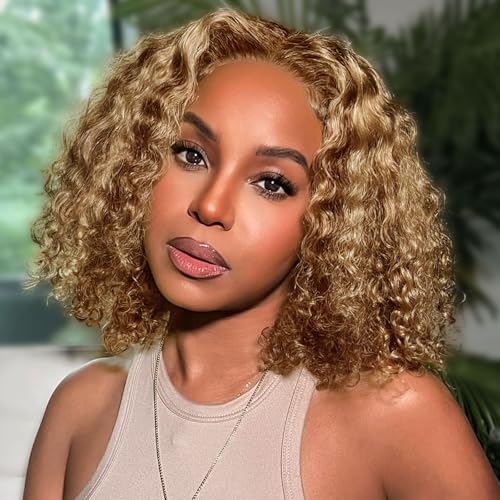
1. Ombre Highlight Deep Wave BOB Wig Human Hair Curly Material: This Ombre Highlight Deep Wave Lace Front BOB Wigs Human Hair Is Made Of High Quality 10A Grade Unprocessed Virgin Brazilian Human Hair, Which Cut From Young Healthy Donor. Can Be Dyed, Restyled Or Straightened As Your Own Hair

1. Deep Wave Curly BOB Wig Human Hair Glueless Material: This Deep Wave Lace Front BOB Wigs Human Hair Is Made Of High Quality 10A Grade Unprocessed Virgin Brazilian Human Hair, Which Cut From Young Healthy Donor. Can Be Dyed, Restyled Or Straightened As Your Own Hair
2. Layered Curls
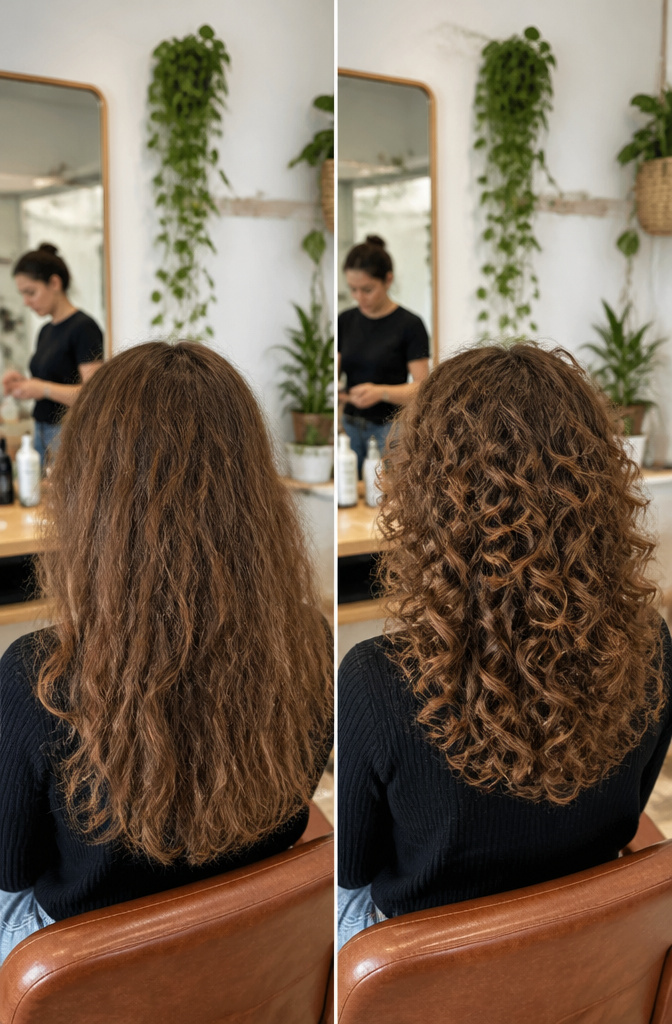
Layering removes bulk from the interior of curly hair while keeping the overall length intact, which lets the curls spring up and find their natural pattern instead of being weighed down. The technique distributes the hair’s weight more evenly, preventing flat roots and heavy ends while adding bounce and movement. The wrong layer placement can create a triangle shape, so the cut needs to be precise enough to avoid that widening silhouette at the bottom. When it works, the result is more volume and better-defined curl patterns without sacrificing the length you want to keep. For maintaining the shape, a lightweight styling cream or mousse helps the layers stay separated and frizz-free.

SheaMoisture Coconut & Hibiscus Frizz-Free Curl Mousse, blended with Fair Trade Shea Butter, helps make your curly hair beautiful and bouncy

GO BOLD AND BOUNCY FOR HYDRATED, DEFINED CURLS: Define curls without stiffness with TRESemmé Bouncy Curls Air Dry Foam. This curling mousse offers a soft, airy foam texture

GEL-TO-FOAM CURL STYLING: Say hello to your new curl bestie with this all-in-one curl styling superstar. She does it all with the high hold definition of a gel and the voluminous look of a foam- totally flake-free! Infused with Coconut Oil and Shea Butter to hydrate curls.
3. Curly Pixie Cut
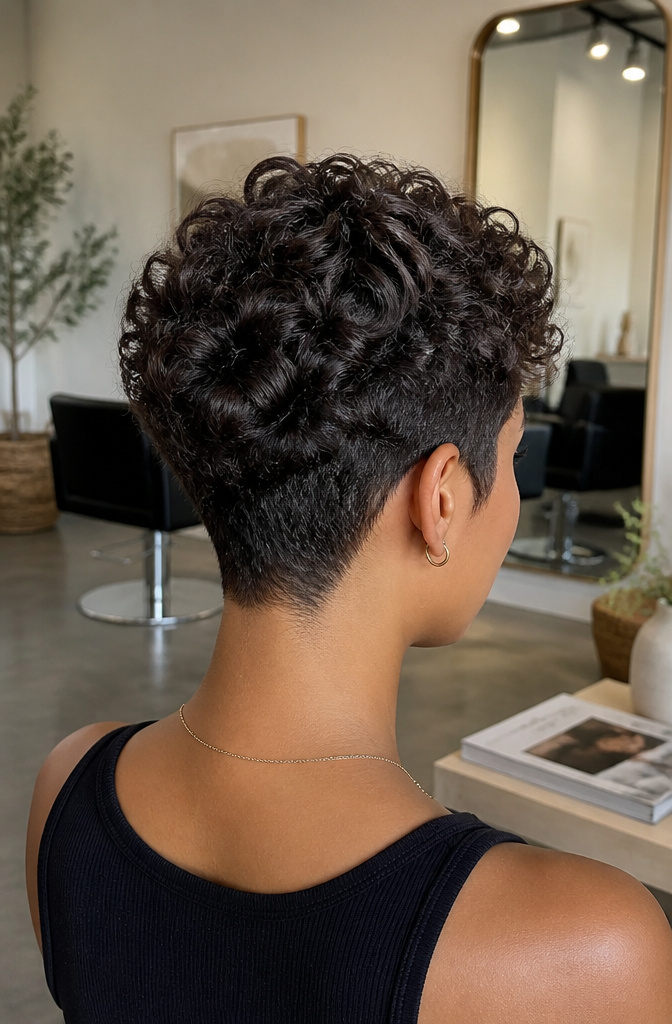
A curly pixie cut is the shortest option that still honors your curl texture, and it is a bold choice for anyone who wants to minimize length without losing personality. The cut relies on your head’s natural shape, so skull roundness matters more than with longer styles. Without enough curve, the silhouette can fall flat or look shapeless.
The curls themselves soften everything, even the short sides and neck area, so the result reads feminine rather than harsh. Slightly longer layers on top give you something to work with, though not so much that styling becomes a project. This is a practical cut for active days, or for anyone who simply does not want to spend time on their hair.
The tradeoff is maintenance. You will need trims every 4–5 weeks to keep the shape intact, especially if you want the tapered back that modernizes the style. A good curly-haired pixie specialist makes the difference between defined, bouncy curls and hair that just turns puffy.

Perfect for Silver, Short & Fine Hair: Gently styles hard-to-hold hair with added volume and lift—no bulk, no burn. The Cool Curl Pencil Iron is a game-changer for seniors, effortlessly reaching short layers to create a smooth, voluminous look or soft, bouncy curls. Lightweight at 0.6 lbs with an easy-grip design for comfortable, strain-free styling.

Hair Material: Made of 100% human hair that is high-quality, shiny, natural, and super soft to the touch, suitable for long term use

Chic Short Style: 6 Inch Brown Highlight Water Wave Wig creates a polished short look with face-framing shape and easy everyday style. Natural look, comfort and daily styling stay balanced. It makes the main value easy to see.
4. Long Curly Layers
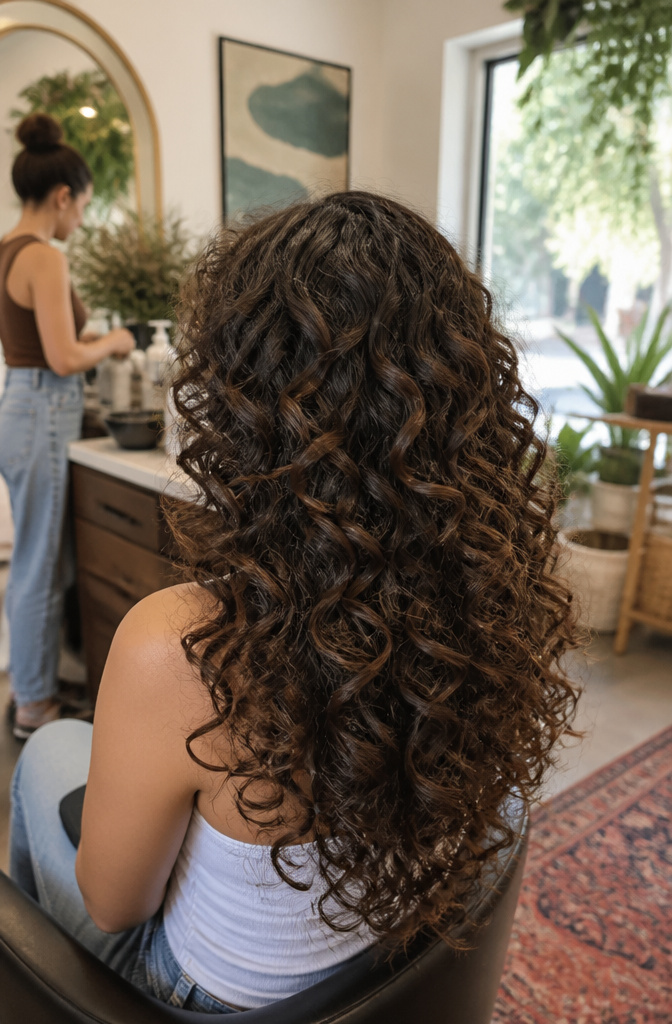
Long curly layers keep your length at or past the shoulder blades while the layering starts higher up, usually around the chin or cheekbones. The point is to stop the bottom from going flat and stringy, which is what happens when long curls carry all their weight at the ends. I have seen this cut go wrong when the layers are too timid and sit too low; the curls still fall heavy and you get that triangle silhouette that most of us are trying to escape. Ask your stylist to begin the layers high enough that the bottom third of your hair feels lighter, not just textured at the very ends. The shape should give you movement and bounce without the insecurity of going short. If you are used to pulling your hair back when you are stressed, this cut keeps that option open. For styling, a lightweight curl cream helps the layers separate cleanly; anything too heavy fights the whole point of removing weight. A long, layered cut lightens the load and gives your curls a lively, bouncy appearance without sacrificing length.
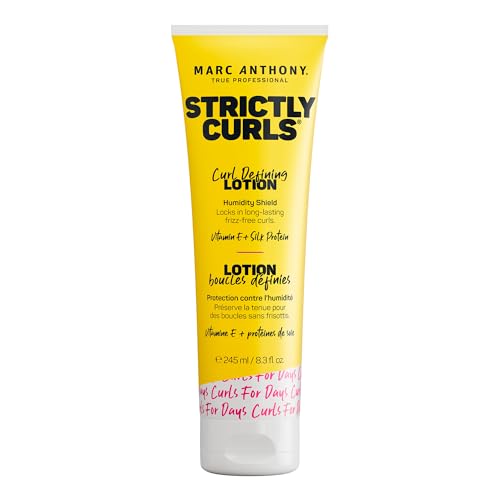
Defined Curls, Zero Crunch: Marc Anthony’s Strictly Curls Curl Defining Lotion is a lightweight styling cream designed to help shape, smooth, and hold curly hair with natural bounce and a soft finish. 8.3 fl oz

Anti-frizz formula: Cold-pressed Moroccan argan oil blend instantly tames flyaways and controls frizz for sleek, defined curls; paraben-free, sulfate-free styling cream suitable for all curl types and hair textures for smooth, manageable locks daily.

Separates and defines curls while nourishing hair. Replaces the need for multiple curl products.
5. Curly Mohawk
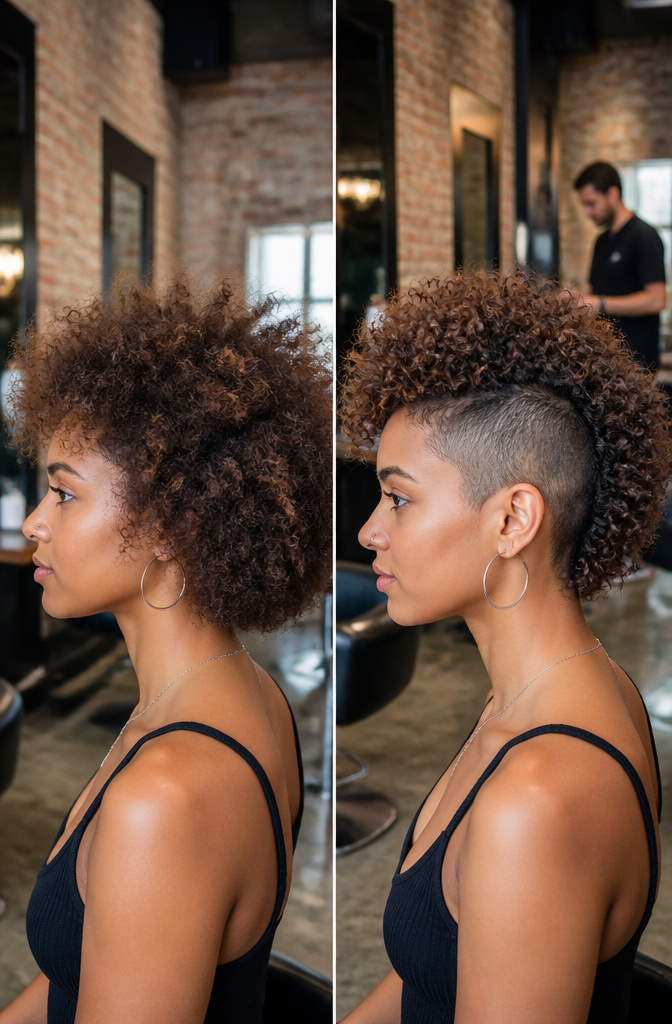
A curly mohawk pairs shaved or closely cut sides with full, voluminous curls on top, and that contrast is exactly what makes it work. The tight sides keep the shape controlled while the crown gets to do whatever it wants, which is honestly a practical way to manage curls rather than fight them all over.
The silhouette reads edgy, sure, but the real payoff is structural. Curls need room to spring and shrink on their own terms; pinning them down at the sides would just create bulk where you do not want it. Taking the sides down short or fading them removes the problem entirely and lets the top be the statement.
There is a maintenance tradeoff. The sides grow out fast, and the clean line that makes the style click starts to blur quickly. Plan on a trim every three to four weeks if you want to keep the contrast sharp. Skip that, and the whole thing softens into something else entirely.

1.Material: High Quality Fiber Synthetic wigs with no shedding,tangling and odor.Soft,strong,full and adjustable.

1. Ginger BOB Wig Human Hair Deep Wave Curly Material: This Ginger Orange Deep Wave Lace Front BOB Wigs Human Hair Is Made Of High Quality 10A Grade Unprocessed Virgin Brazilian Human Hair, Which Cut From Young Healthy Donor. Can Be Dyed, Restyled Or Straightened As Your Own Hair

Dark Burgundy Curly BOB Wig Human Hair Material:The Dark Burgundy Deep Wave BOB Wig Made Of Unprocessed 12A Brazilian 100% Human Hair,Soft & Pure,Can Be Dyed & Bleached,220 Density Virgin Hair Wigs,Full & Thick,No Shedding & No Tangle
6. Curly Lob
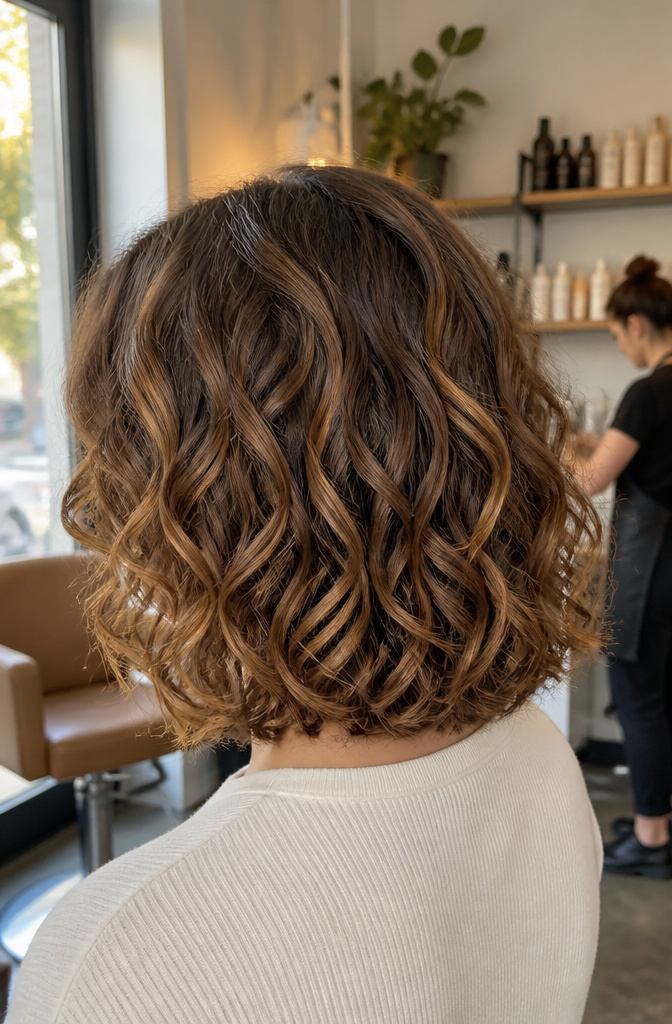
A curly lob sits right at the collarbone, long enough to pull back but short enough to feel like an actual cut. It keeps the shape of a bob without the intensity of going full chin-length, and it grows out far more politely than anything shorter.
The real win is how it works across curl types. Tighter coils get weight taken off the ends so they spring up without going triangular, while looser waves keep enough length to hang rather than puff. You can ask your stylist for a rounded perimeter to avoid that pyramid silhouette, or keep it slightly longer in front if you tuck hair behind your ears.
Maintenance sits somewhere in the middle too. You will still need regular trims to keep the line sharp, but you are not locked into the every-six-weeks schedule that a true bob demands. For anyone nervous about committing to short hair, this is the sensible halfway house.

Curl-Defining Mousse: Lightweight foaming mousse helps define curls, enhance natural texture and support soft bouncy styles while adding moisture and shine to natural or relaxed hair

WHIPPED CURL MOUSSE: This curl boosting mousse shapes your curls for super curl power and control. Powered by natural ingredients, your curls will be soft-to-the-touch yet big ‘n bold with the ultimate day-to-night frizz and humidity protection, with zero crunch.

Hair Care Innovation: Marc Anthony hair products in the Strictly Curls collection delivers professional quality formulas free from harmful sulfates, parabens, and phthalates. For men, women and all hair types, from wavy to curly to colored and more.
7. Curly Bangs
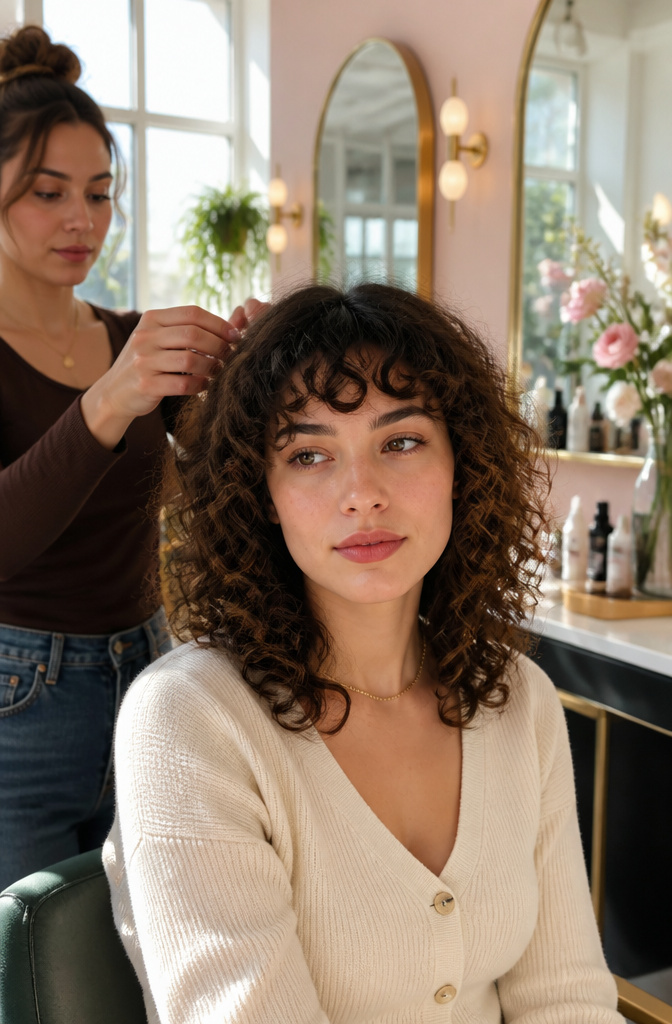
Curly bangs are one of those cuts that either frame your face perfectly or sit on your forehead like a puffy helmet. The difference usually comes down to two things you need to sort out before the scissors touch your hair.
Face shape matters more with curls than with straight fringe because the spring adds width. An oval face can carry almost any bang style, but round or heart-shaped faces generally do better with a side-swept angle that breaks up the curve rather than a blunt line across. Your hair thickness is the other make-or-break factor. Heavy, dense curls can support a solid bang without trouble. Thin or fine curls need a piece-y, broken-up look with gaps between the ringlets. Force too much hair forward for a thick bang and you’ll drain volume from the rest of your style, ending up with a flat cut overall.
Shrinkage is the part that trips people up. Curls draw up as they dry, so bangs must be cut longer than you want them to land. A dry cut is the only way to judge that length accurately. Wet curls condense and lie flat, hiding how much mass you’re really removing.
"After all we wear our hair dry, not wet."
— Vogue
That means scheduling your trim for day two or three post-wash, when your pattern has fully settled. Your stylist can see the true shape each curl takes and cut to where it will actually fall, not where it stretches when soaked.

PREMIUM MATERIAL: Short Curly Wig made of 100% human hair pixie cut wig with natural black color, offering authentic look and styling versatility
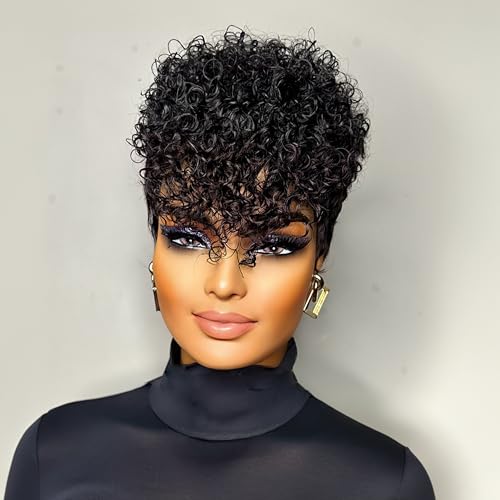
PREMIUM MATERIAL: 100% human hair,soft touth, short wig pixie cut wig with curly wave texture and 150% density for full, bouncy volume

【Finger Wave Wig】Pixie vintage wig for women to make you look more charming, stylish, and beautiful. Our design team has developed different colors to suit women of all skin tones, you can create a stylish look in front of your dresser. Soft and comfortable to wear, make you feel like a whole new person.
8. Curly Shag
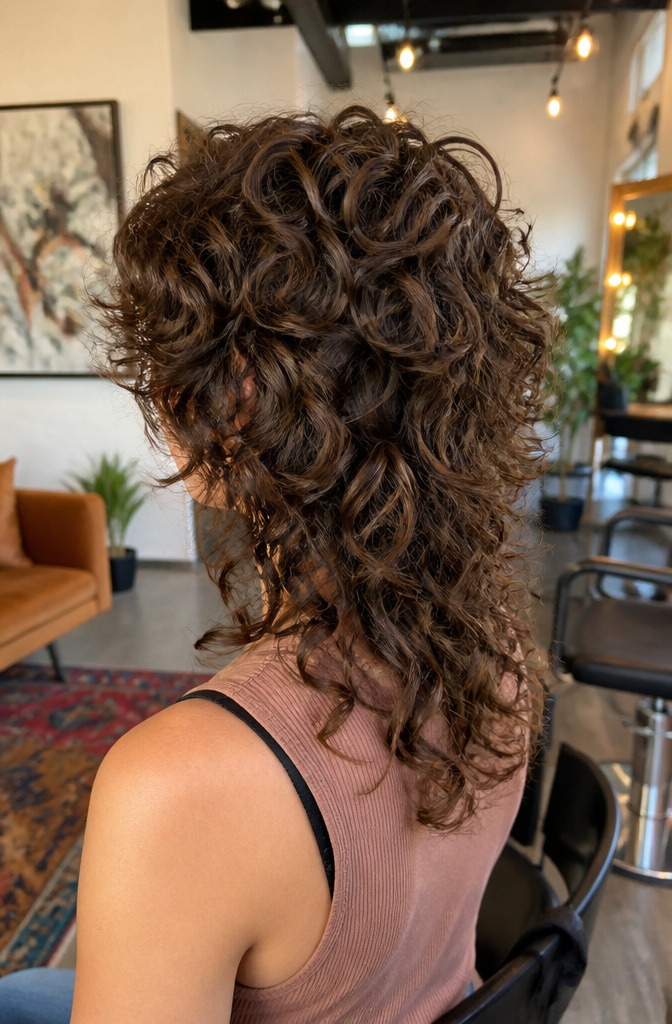
The curly shag builds its shape from heavy, deliberate layering at the crown and around the face while the length stays intact below. That top-to-bottom disconnection is not a mistake; it is the whole point. The short layers create a rock-and-roll silhouette, but the real payoff for curls is mechanical. Each layer lightens the weight that pulls curls flat, so spring and definition travel higher up the head instead of collecting at the ends.
What convinced me, reading through a dozen of these breakdowns, is how the cut turns gravity into a helper rather than a problem. The crown layers float, the face-framing pieces do what they want, and the lower length keeps enough heft to stop the shape from looking like a triangle. Curls need that room to move independently.
Ask your stylist to keep the bottom edge solid. If they blend the layers through to the ends, you lose the architecture and the volume collapses into one rounded mass. The gap between the layered top and the blunt bottom is what makes the silhouette read as a shag rather than just a layered cut.

Define & Hold Shape Without Crunch: Marc Anthony Strictly Curls Define & Hold Flex Gel defines curly and coily hair with long-lasting strong hold, while still leaving curls flexible with movement and bounce, without crunch and added shine. 8 oz

Defines curls and helps control frizz for smooth, touchable styles

CURL ENHANCING CREAM—Our Hydrating Jojoba Oil Curl Cream is formulated to hydrate and define your curls, leaving them soft and natural. This curl cream for curly hair also moisturizes your hair, adding shine to dry curls.
9. Butterfly Cut
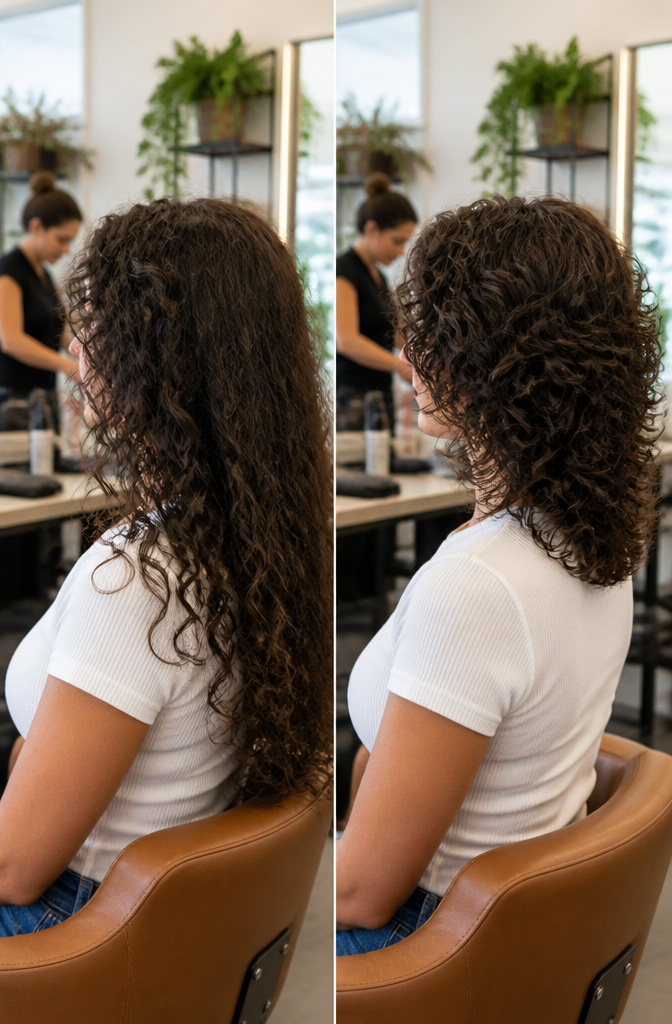
The butterfly cut builds layers that fan out like wings, shorter through the crown and sides while the back keeps its length. When you wear it down and push the hair slightly forward, the shape opens up and you see where the name comes from.
What makes this work for curls is the weight distribution. The shorter top layers take out bulk where it tends to sit heaviest, and the longer back gives you something to shape without losing the overall silhouette. Ask your stylist to keep the back perimeter intact if you want to pull it into a low ponytail or clip; once that length goes, the style changes completely.
I think this cut flatters most when the shortest layers hit somewhere around the cheekbone or just below, not higher. Too short at the crown and the wings lose their soft curve, especially on tighter curl patterns that spring up more than they hang. The push-forward styling matters too, so mention it when you’re in the chair if that’s how you plan to wear it day to day.

5x6 Wear and Go Glueless Lace Front Deep Curly Bob Wigs Human Hair Material: High Quality Brazilian Human Hair, Healthy and Vibrant, Comfortable Against Skin.

Human Hair Bob Wigs With Bangs: Selected Human Hair, Natural and Healthy,Soft and Bouncing,Great Texture,Can be Straightened,Restyled Just Like Your Own Hair
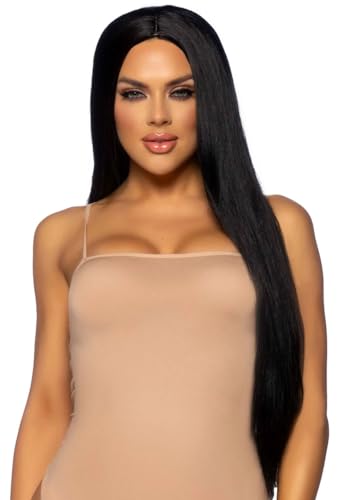
From rave festival to costume party, the Leg Avenue 24” Long Straight Bang Wig will transform you into any party-loving character you’d like for a night with long blunt cut hair and adjustable wig cap
10. Curly Tapered Cut
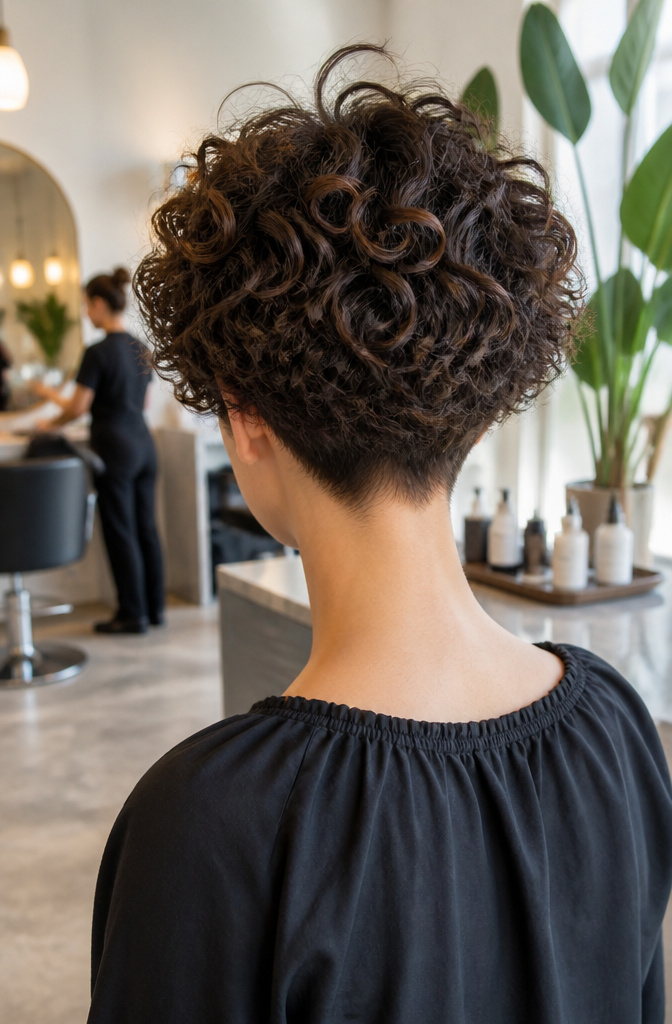
A curly tapered cut narrows toward the neckline, removing weight from the lower perimeter so curls sit in a rounded shape rather than expanding outward. That rounded silhouette is what a lot of people assume curly hair does naturally, but left to its own devices it usually ends up triangular or shapeless instead.
The taper keeps the back clean and light, which matters because short curly cuts tend to bulk up at the nape and lose their shape after a few weeks. With the weight taken out underneath, the curls stay defined and the whole style settles into something even better on day two or three, once the curls have softened into that lived-in look.
If you are going this short, see a stylist who actually works with curly pixie cuts regularly. The difference between someone who understands how to taper textured hair and someone who treats it like straight hair is huge, and it shows most at the back where the shape is made or broken.

Garnier Fructis Curl Construct Creation Mousse gives you the power to control your curls with long-lasting hold and bounce. This curly hair mousse defines curls and waves from root to tip

CURL ENHANCING DUO: Captivate curls and enhance natural definition with this iconic curl duo. The cream moisturizes and defines while the mousse adds bounce and hold. Your curls will be soft-to-the-touch yet big ‘n bold with the ultimate day-to-night frizz and humidity protection, with zero crunch.

MOISTURIZE & DEFINE: This airy curl foam shapes and defines each strand for soft, touchable curls with zero crunch. Leaves hair looking and feeling moisturized, with flexible hold that keeps curls healthy-looking all day.
Why the Right Cut Matters
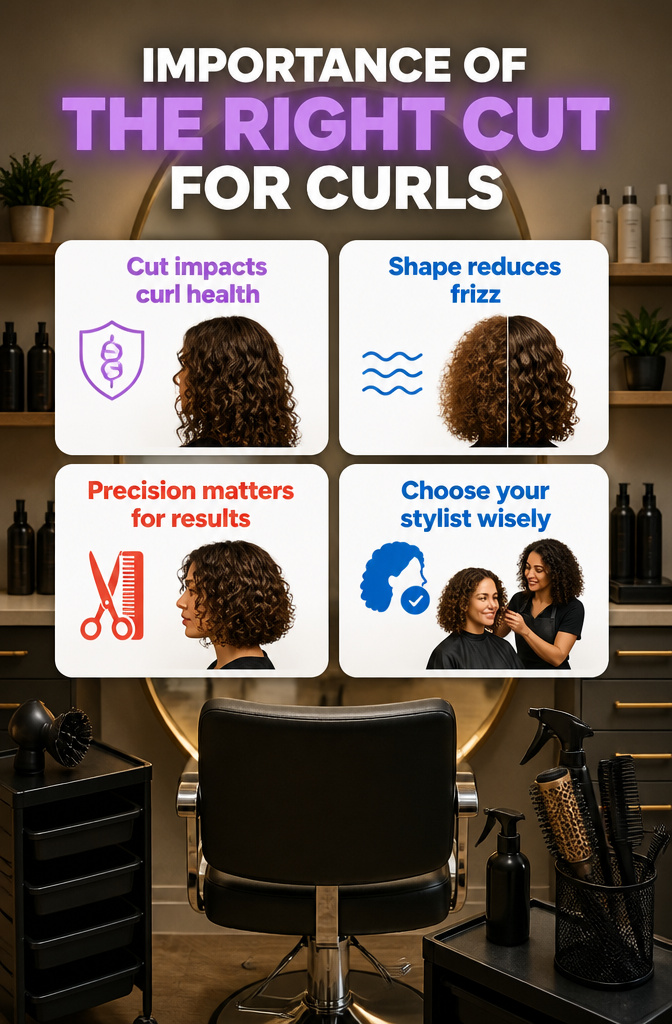
Curly hair is naturally more prone to dryness and frizz, which makes the cut itself a health decision, not just a style one. The right shape removes bulk where it weighs curls down, adds movement where they fall flat, and creates a frame that works with your texture instead of against it. I’ve watched friends with similar curl patterns walk out of the same salon with completely different results, and the difference was almost always the specificity of the cut, not the products used after.
A stylist who specializes in curls understands that dry cutting lets the curl pattern reveal itself before any length disappears. Wet curls lie straighter; cut them wet and you’re guessing at the spring-back. This matters because the ten styles ahead each depend on a different balance of weight, layer placement, and perimeter shape. Treat curls as one generic type and you miss what makes a curly bob distinct from a curly lob, or why a pixie on coily hair needs a completely different approach than one on loose waves.
The goal is a cut that defines your curl pattern, adds volume where you want it, and reduces the daily battle with frizz. Get that foundation right, and the styling becomes simpler, not harder.
Dry Cut vs. Wet Cut for Curly Hair
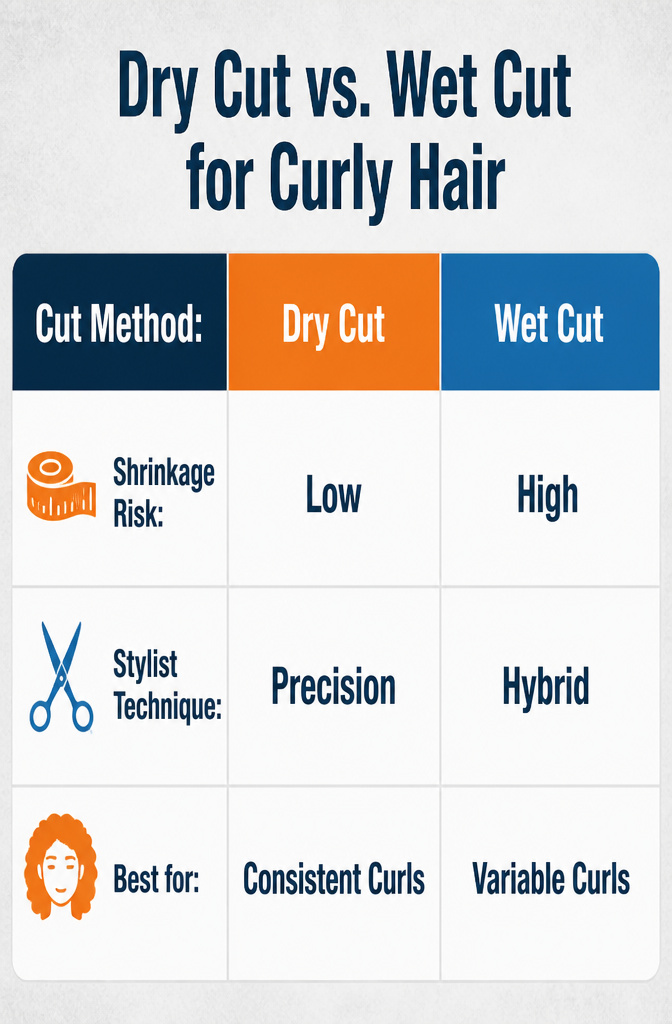
Curly hair has a mind of its own once it dries, which is why standard wet cuts can leave you with shrinkage you never saw coming. Water pulls curls tight and stretches them out, so a stylist might take off two inches that turn into four by the time you leave the salon. That is why dry cutting has gained so much traction in the curl community: the hair stays in its natural state, coil by coil, and you see the shape as it actually lives.
The DevaCut works this way, cutting curl by curl while the hair is completely dry. Each strand gets shaped where it falls, which sounds ideal until you realize your curls rearrange themselves overnight. Some people walk out loving the precision; others wake up to lopsided volume they did not bargain for.
Ouidad takes a different route with its Carve and Slice method. The cut starts wet, slicing into the curls to build the overall shape, then the stylist dries the hair and rechecks the balance before finishing. This hybrid approach tends to give a more even result across different curl types, and it is the one I would lean toward if you want a style that behaves predictably whether you wear it curly or stretched.
If your curls are consistent from day to day, a dry cut might suit you fine. If they shift and settle differently every morning, that wet-to-dry check could save you from a three-month grow-out you did not plan on.
How Often to Trim Curly Hair
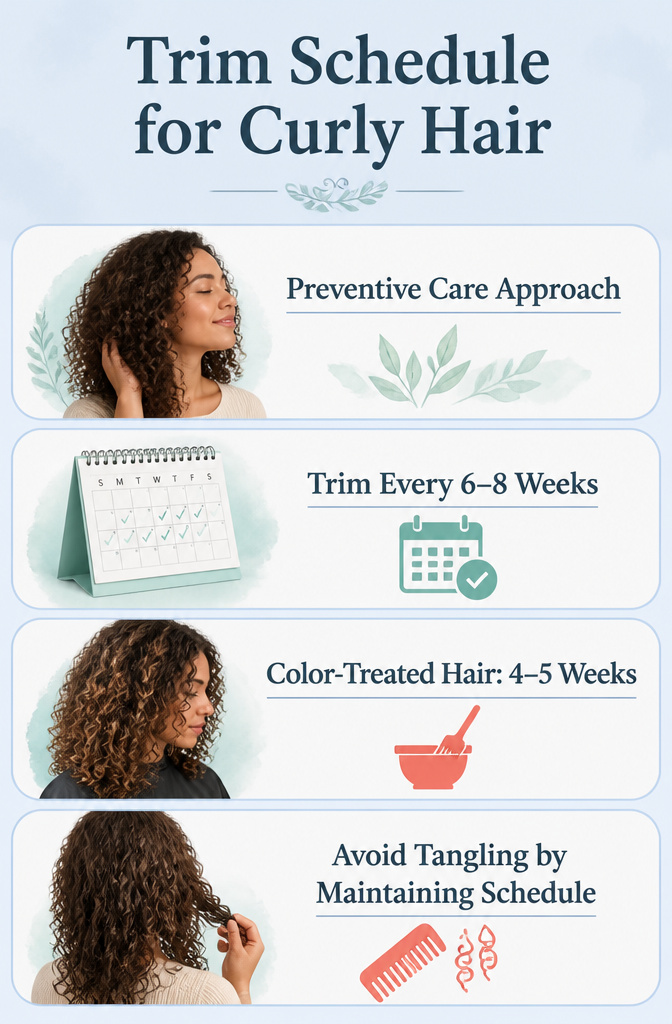
Curly hair doesn’t announce damage the way straight hair does. You won’t always see split ends catching the light; instead, shape goes flat, tangles multiply, and single-strand knots start showing up in the shower. That’s why the trim schedule for cut curly hairstyles is preventive, not reactive. Most curl patterns hold their shape best with a trim every 6–8 weeks. If your hair is color-treated or you’re maintaining a shorter style like a pixie, every 4–5 weeks keeps the silhouette from blurring out. I book my standing appointments ahead of time; otherwise, six weeks becomes ten, and by then I’m fighting tangles I could have avoided.
What I Use on My Curls
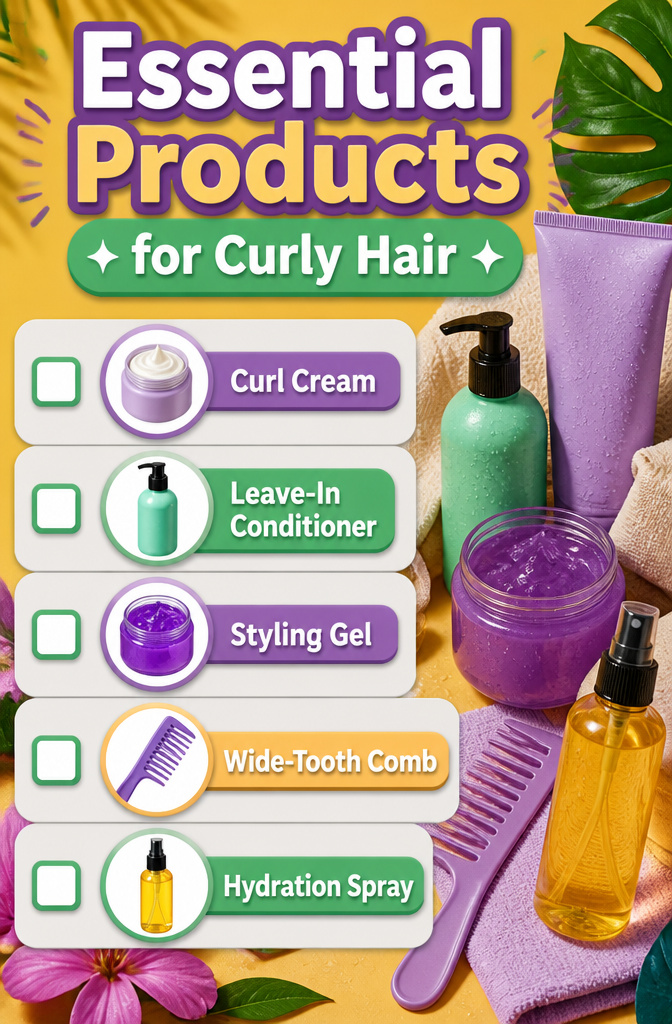
The right products make or break a cut curly hairstyle, and I’ve learned to keep my routine to three categories. Here’s what actually matters once you leave the salon:
- Curl cream is your moisture anchor. Work it through damp hair right after rinsing; it seals hydration before anything else goes on. I skip this step and my curls flatten by noon.
- Leave-in conditioner keeps the cut behaving between washes. Focus on mid-lengths and ends, where dryness shows first. The sources I trust note that dehydrated protein chains lose bounce fast, so I treat this as repair, not optional softness.
- Styling gel gives the shape hold without crunch, if you apply it right. Smooth over your curl cream, then scrunch upward and let it set. I used to rake it through like a straight-hair product and wondered why my definition fell apart.
One note on timing: I always apply everything to wet hair, distributing with my fingers or a wide comb. Dry application fights the product instead of working with it. And if your hair is color-treated, the schedule shifts; trims move from every 6–8 weeks down to 4–6 weeks to catch damage before it splits upward.
Frequently Asked Questions
What is the best haircut for curly hair?
The best cut depends on your curl type and how much length you want to keep. A bob or lob works well for medium to tight curls that need structure, while layered cuts remove bulk without sacrificing length. Pixie cuts and tapered styles suit anyone ready to go short, and shags or butterfly cuts add volume through deliberate layering at the crown.
How often should I cut my curly hair?
Most curly hair needs a trim every 6–8 weeks to keep its shape and prevent tangles or single-strand knots. Shorter styles like a pixie or mohawk need attention every 3–5 weeks, and color-treated curls should land on the shorter end of that range too.
Can I cut my curly hair myself?
You can, but it is risky. The popular unicorn cut, where hair is pulled to the top of the head and sliced straight across, usually ends up uneven because it is hard to hold your own hair steady. If you need a touch-up between salon visits, follow a dry-cutting guide from a curl specialist rather than guessing at wet length.